
How-To Guide - Admins
How to send a student their personalized form link as an admin
Generate a signed, student-specific link for any published data-collection form, copy it, and email it out — whatever the student submits merges straight into their own record, no login needed.
Updated August 19, 2026
Overview
Use this guide when you need one specific student to fill out a form — an intake, a results questionnaire, a profile update — and you want their answers landing in their record automatically instead of in an unowned pile you have to match up by hand. A personalized form link is a signed URL bound to one student and one form: generate it from the Forms list, copy it, and send it however you normally reach that student. When they open it, the form already knows who they are, and everything they submit merges into their own record — no account, no login.
Before you start
- The form is a published data-collection form — one that writes into a student's record. Draft forms and plain lead-capture forms don't get the personalized-link option.
- The student already exists in Gigpie, so they show up when you search by name or email.
- You have a way to reach the student directly — email, text, or however you normally contact them. Gigpie does not send the link for you.
Why this matters
A form's regular public URL is anonymous: anyone can open it, and Gigpie has to work out afterward whose record a submission belongs to — or hold it unbound for staff review. A personalized link removes that guesswork. The link itself carries a signed token naming the student, so the form opens with their name and email prefilled, and the submission writes into their record the moment it lands. This is the workflow that replaced the old per-record URLs from miniExtensions: instead of hunting down a record-specific spreadsheet link, you mint one from the form's row in seconds.
The flip side of that convenience is that the link is the identity. Anyone who opens it writes to that student's record, so treat it like you'd treat the record itself: send it to the student (or their family), not to a group thread or a shared inbox. Links expire on their own — 14 days by default — which limits how long a forwarded link stays live.
Tips
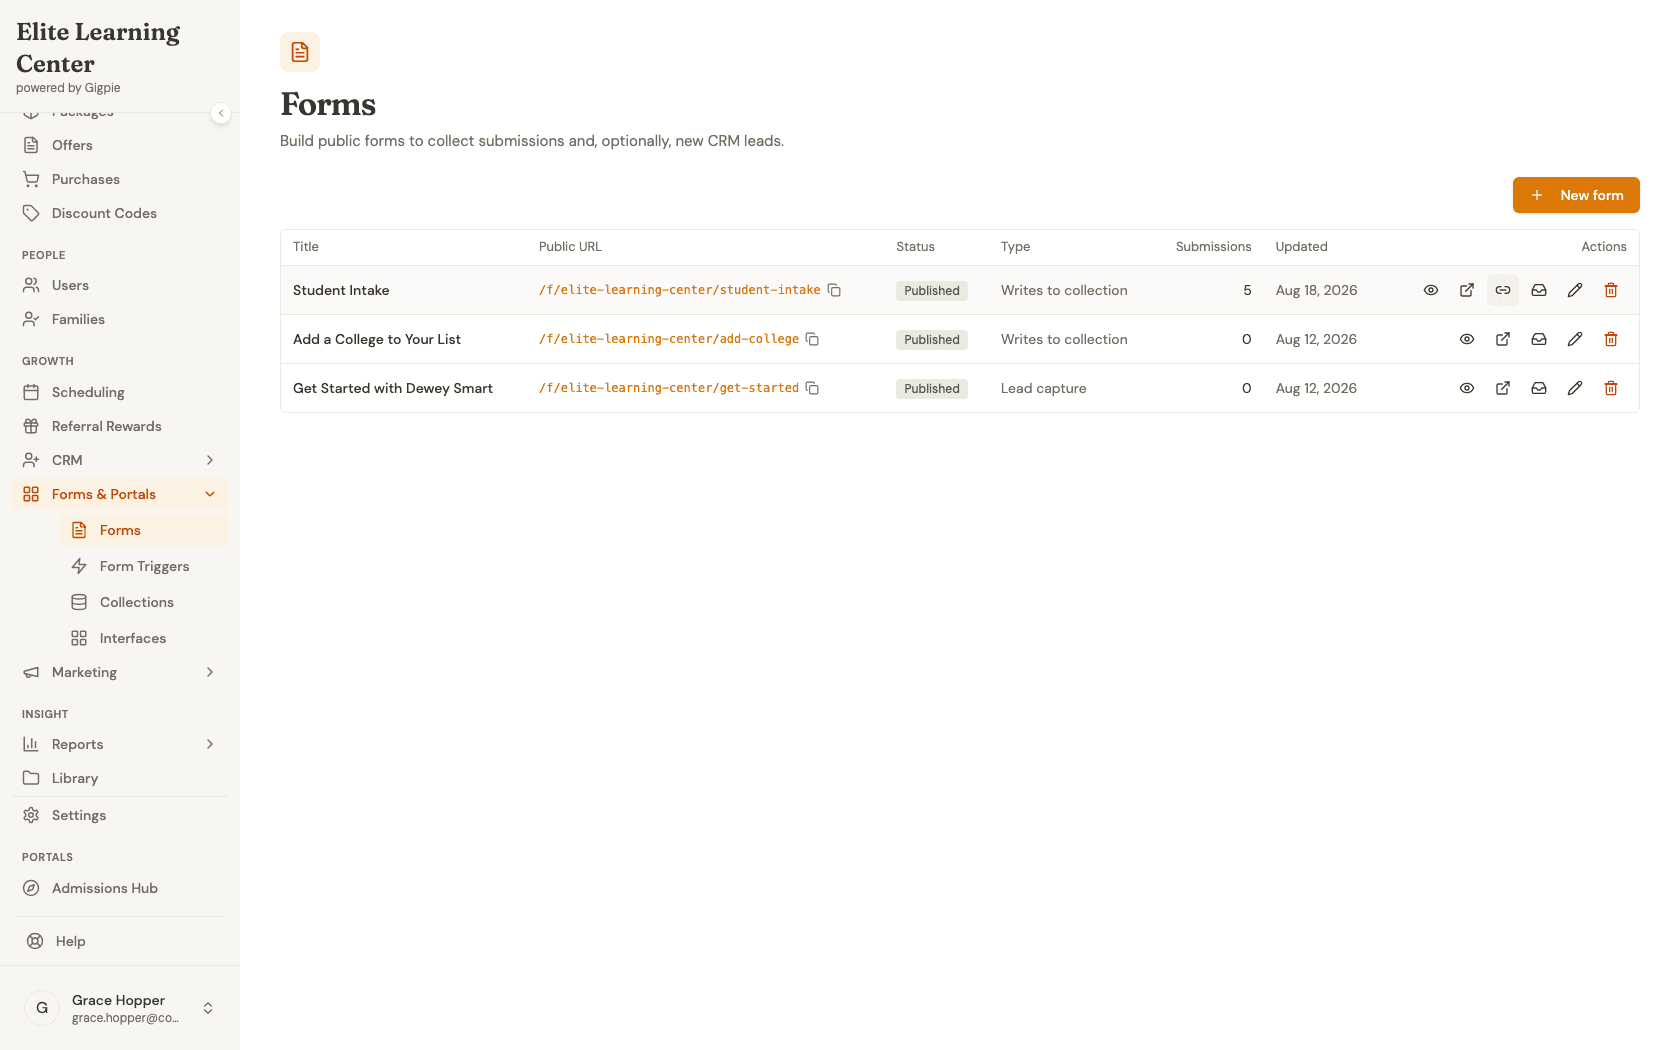
- The link icon only appears on published forms that collect data about a student. If you don't see it on a form's row, check the Status column — a Draft form has to be published first — and confirm the form actually writes into a student record rather than just capturing leads.
- Regenerate freely. Minting a new link for the same student never breaks the old one — every link you've created stays valid until its own expiry date. There's no revoke step, so if a link reaches the wrong hands, the 14-day expiry is your backstop.
- When a link expires, the student sees a plain "This link has expired" page asking them to contact you — nothing scary, and nothing about their record leaks. Just mint a fresh link and resend it.
- The dialog's "Create another" button clears the search so you can work through a list of students in one sitting — search, click, copy, paste into your email, repeat.
- This same mechanism powers results-season sends: a results questionnaire set up as a data-collection form gets the identical link icon, so "email every senior their own results link" is this exact workflow, once per student.
Steps
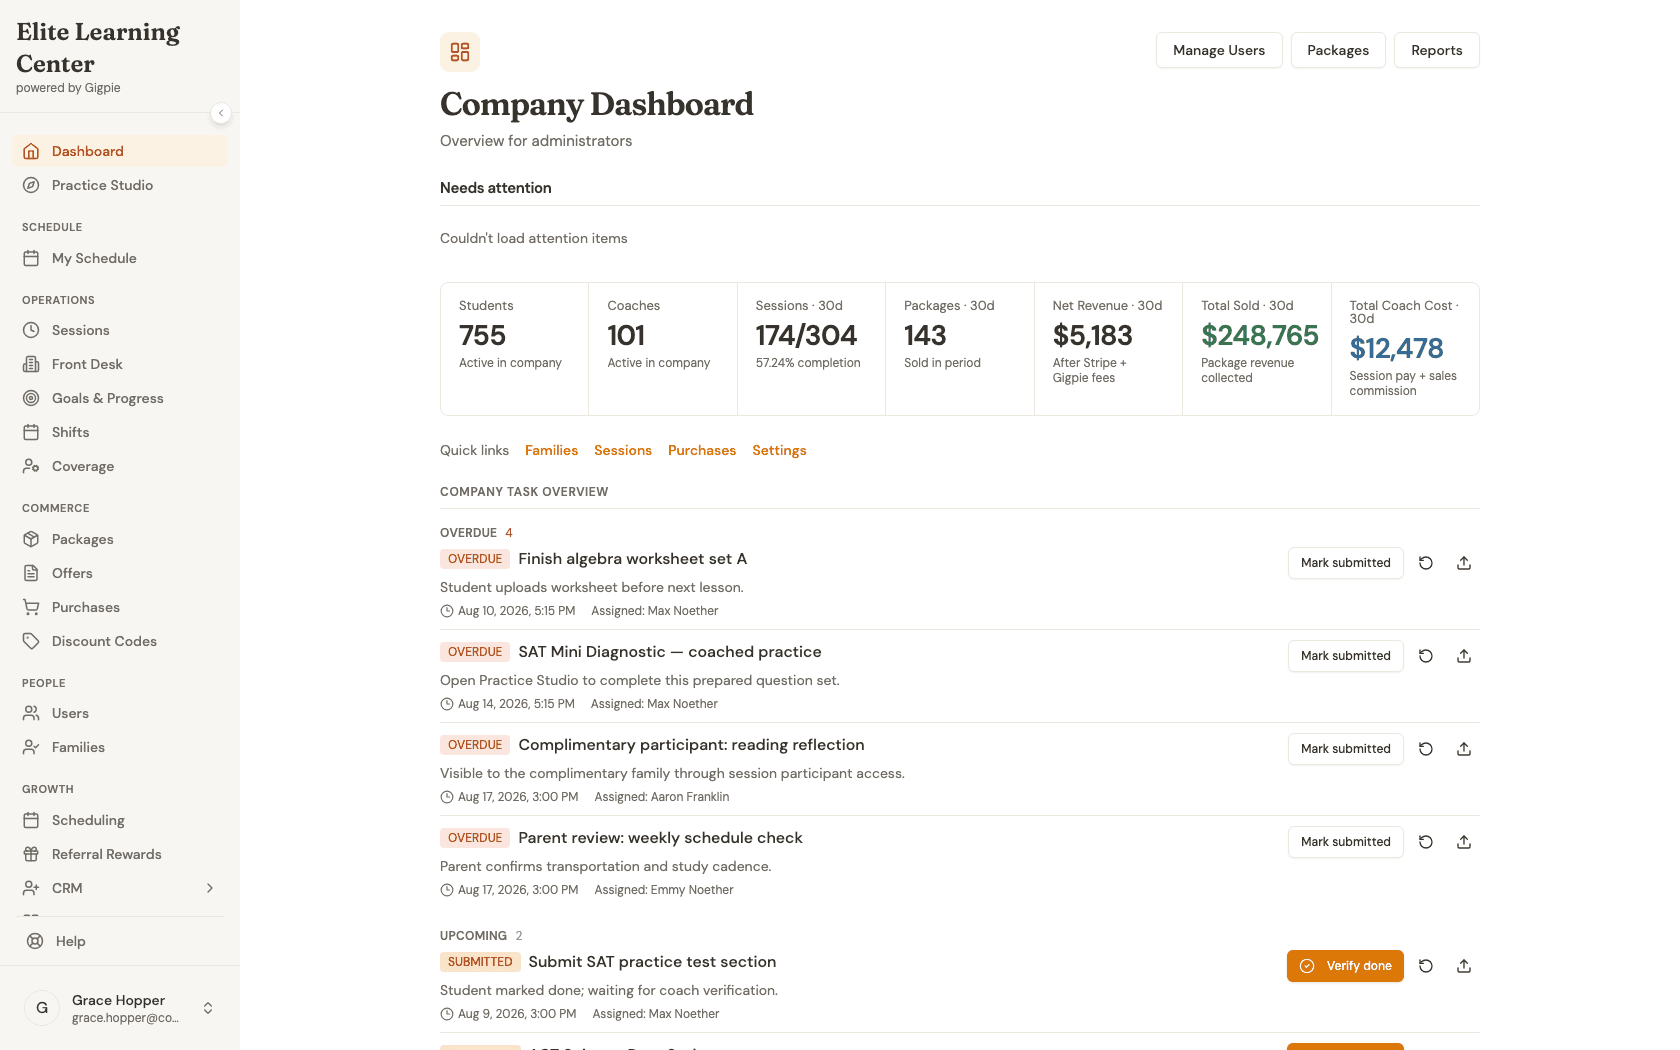
- 1Go to login
Sign in as an admin
Use your admin account credentials to access the dashboard.
- 2
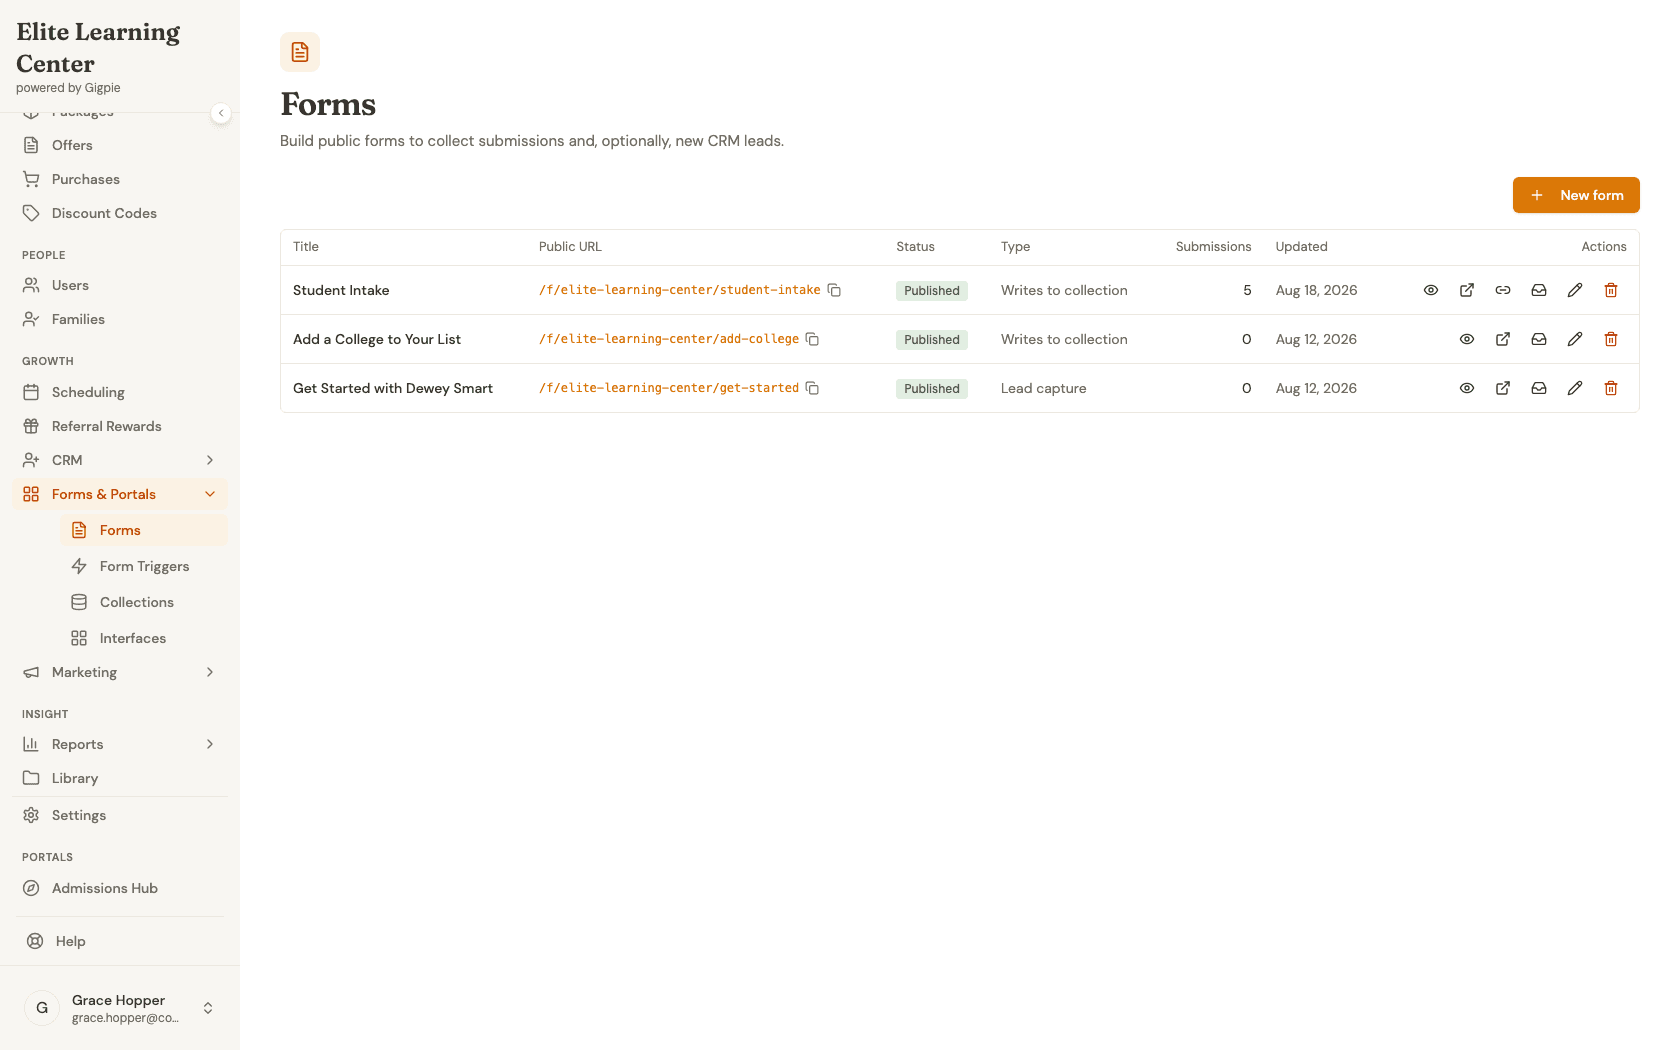
Navigate to Forms
In the sidebar, open the Forms & Portals group and click Forms. The list shows every form your company has, with its public URL, publish status, type, and submission count.
- 3
Spot the personalized-link icon
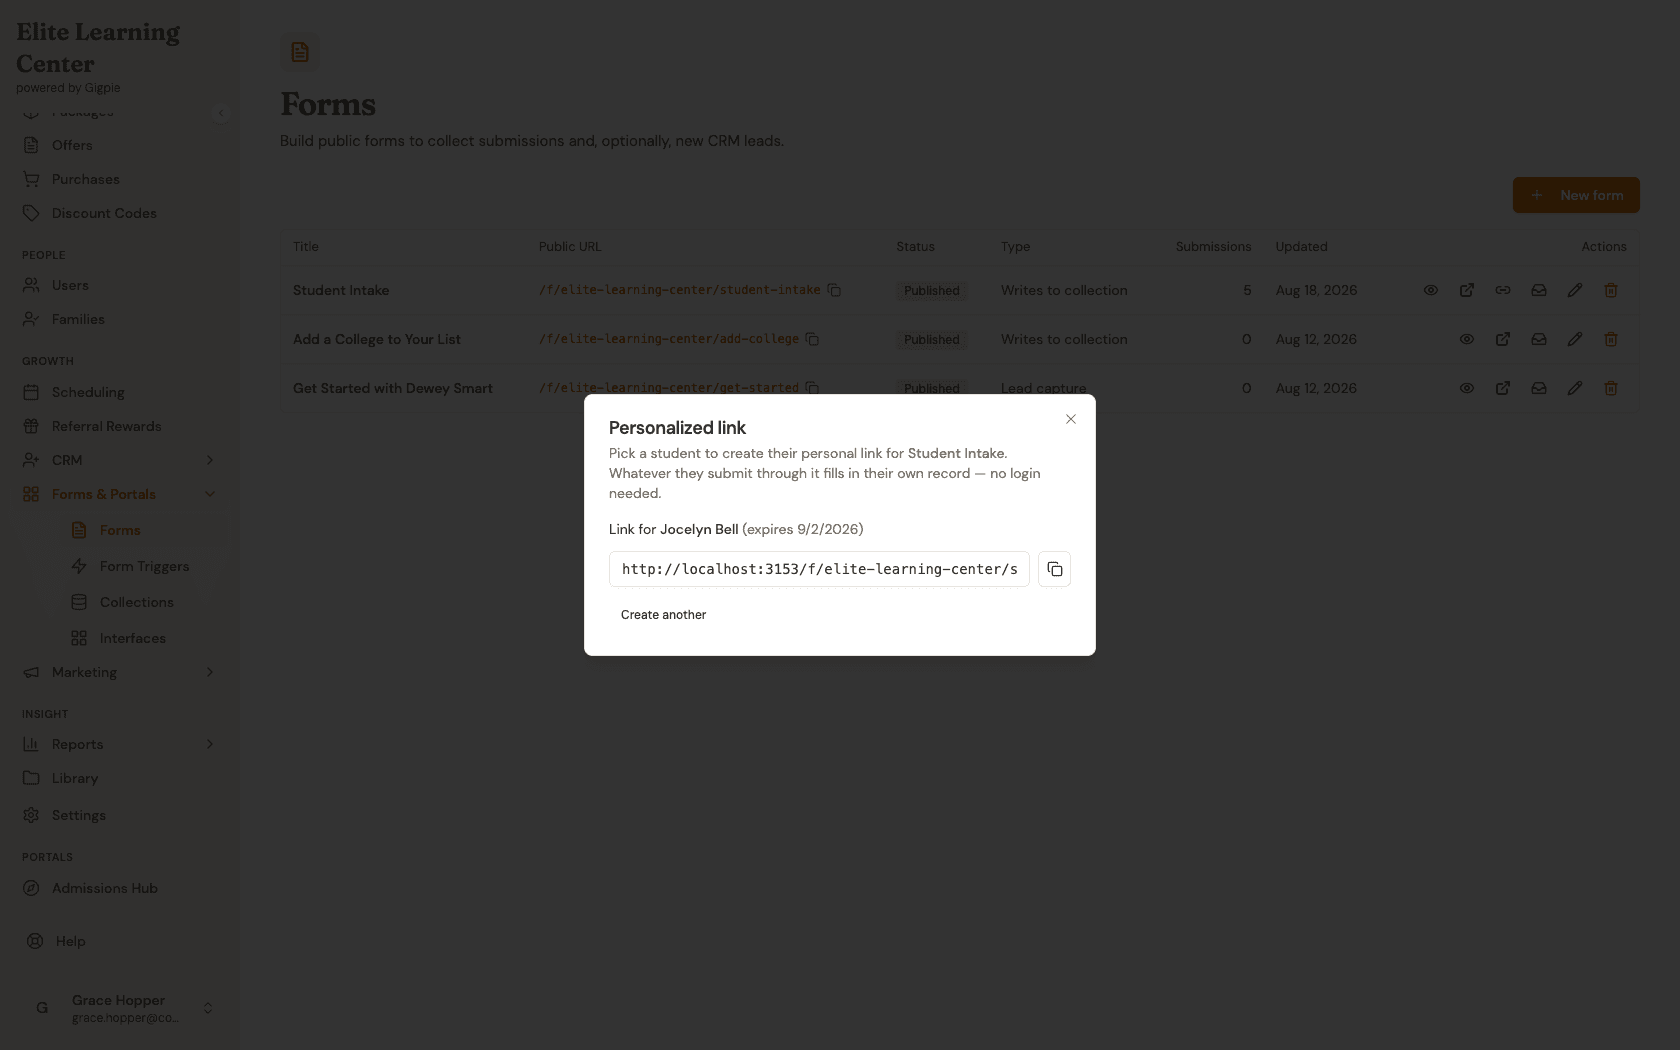
On a published data-collection form — here, Student Intake — the row's Actions column shows an extra link icon labeled "Create personalized link," sitting between the open-public-form and submissions icons. Forms that don't write into a student's record never show it.
- 4
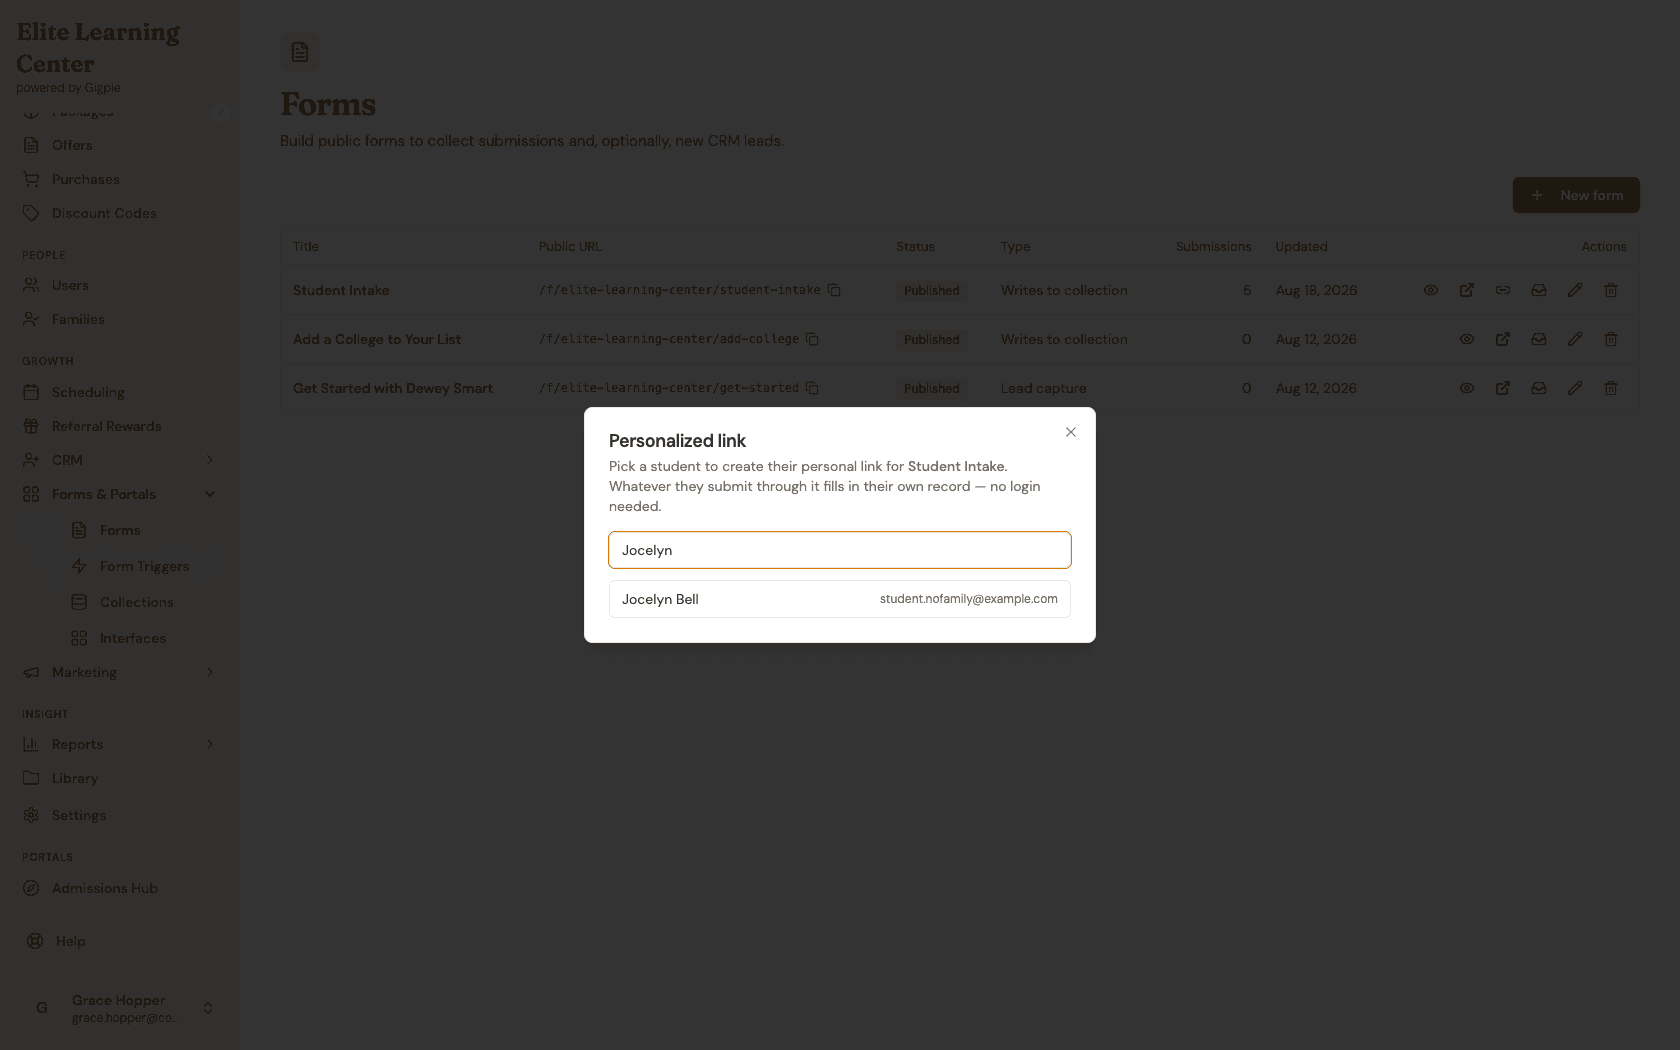
Open the dialog and search for the student
Click the link icon to open the Personalized link dialog. Type part of the student's name or email; matching students appear below the search box with their email alongside, so same-named students are still distinguishable.
- 5
Generate and copy the link
Click the student. Gigpie mints their signed personal URL on the spot and shows it with a copy button and the expiry date — 14 days out. Copy it and paste it into your email or text to the student. Click "Create another" to clear the dialog and mint a link for the next student.
- 6
What the student sees
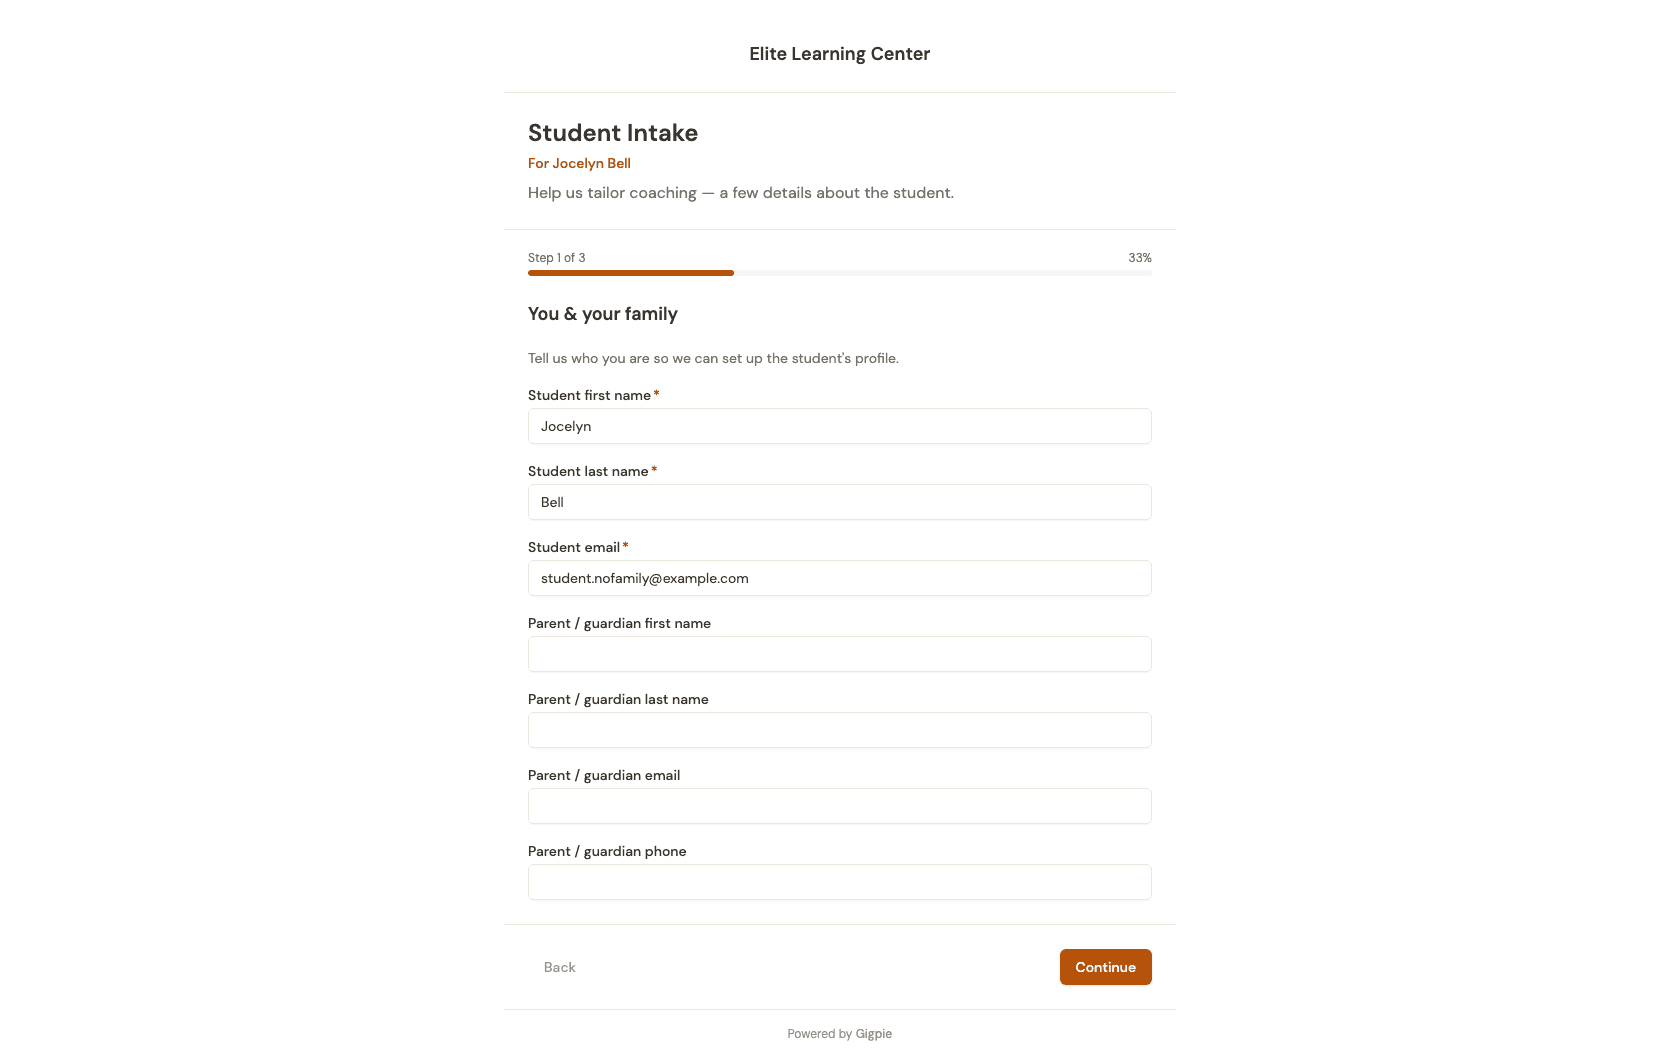
When the student opens their link, the form loads with a "For [their name]" banner under the title and their name and email already filled in — no login, no account creation. They complete the remaining steps and submit; their answers merge into their own record, and the fill shows up under the form's submissions. If they open the link after it expires, they see a short "This link has expired" page asking them to contact you for a fresh one.
What you'll accomplish
- A signed personal URL exists for exactly one student and one form, valid for 14 days, and it's on your clipboard ready to paste into an email.
- Anything the student submits through that link merges into their own record — they never log in, and their name and email arrive prefilled.
- You can mint links for as many students as you need, one after another, and regenerate a fresh link any time without breaking ones you've already sent.
Related Guides
- How to add a family and set up students as an admin - Get the student into Gigpie so they show up in the link dialog's search
- Family Management - How student records, profiles, and family accounts fit together