
How-To Guide - Admins
How to add a family and set up students as an admin
Onboard a new family in one guided flow: add the parent, add one or more students, and assign a starting package so the first session can be booked.
Updated August 10, 2026
Overview
Use this guide to bring on a new family during their first week: create the parent, add their student(s), and assign a starting package — all from a single setup flow. This is the fastest path from "a prospective family said yes" to "they have a package and a session can be booked."
Before you start
- You have the parent's name and email address.
- You know which package the family is starting with (you can also decide this during setup).
- Connect Stripe first if you want a payment link generated and emailed automatically.
Why this matters
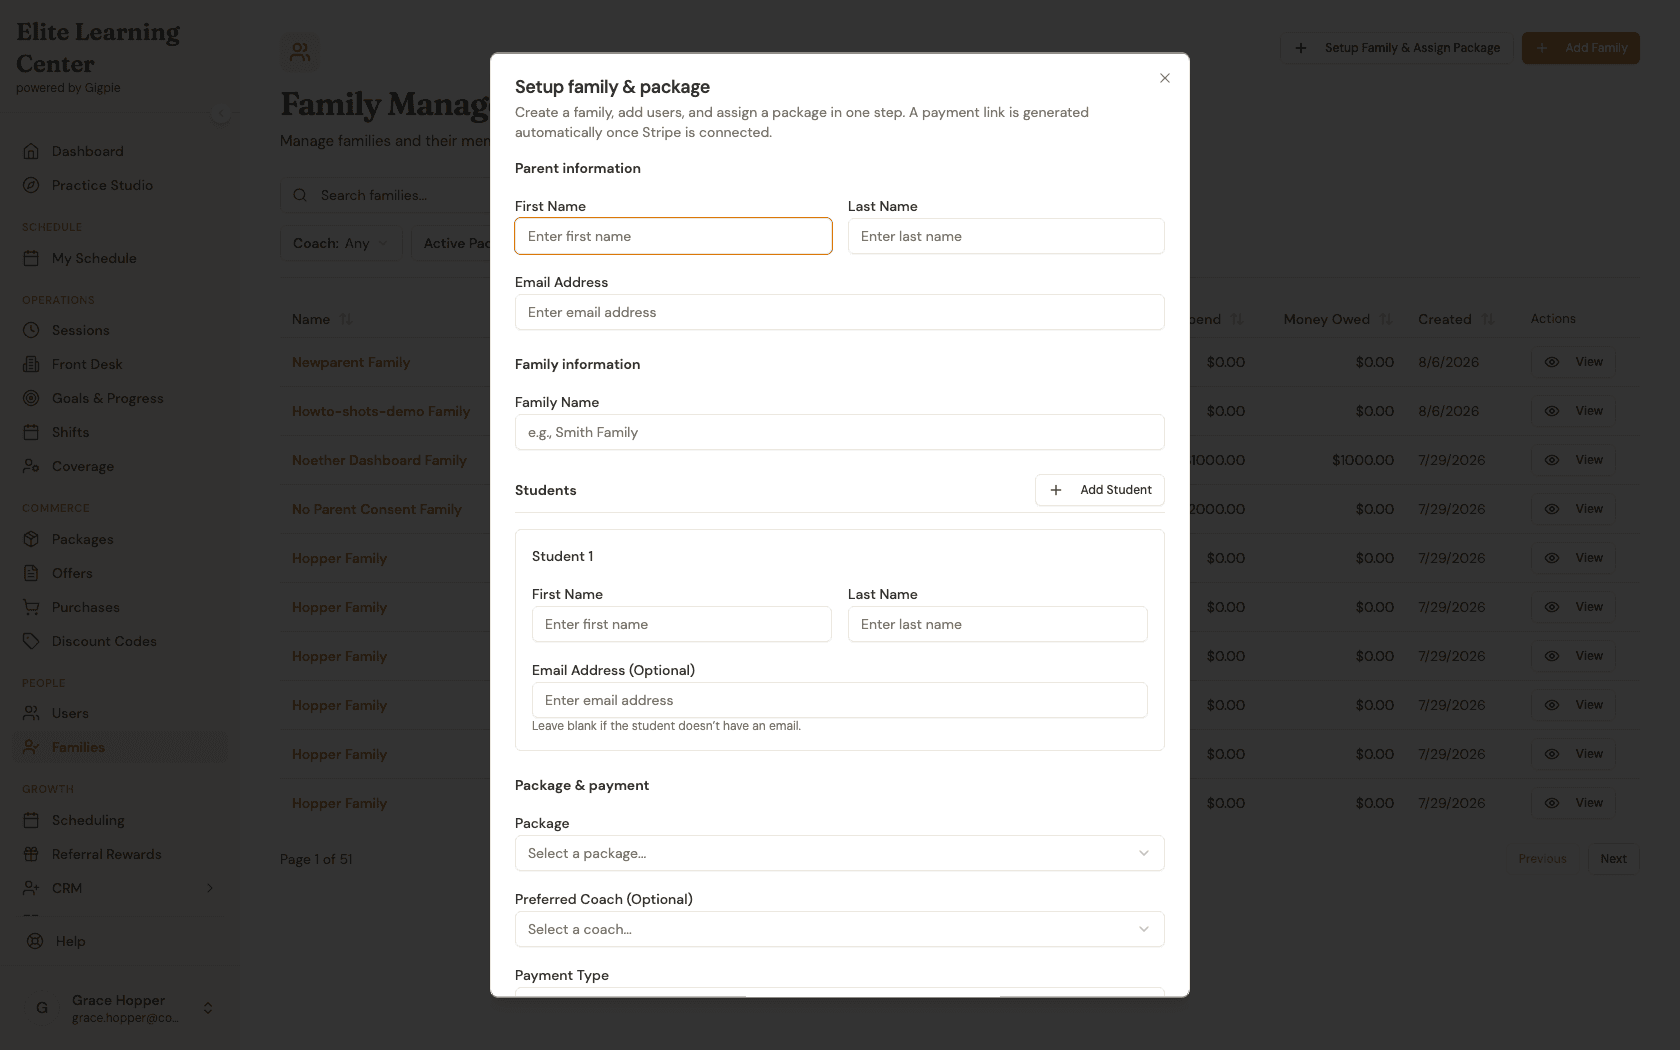
Families page has two "add" buttons, and they do different things. Add Family creates a bare family record and optionally attaches existing users to it — useful when the people already have accounts. Setup Family & Assign Package is the real first-week onboarding flow: it creates the parent as a new user, creates the family, adds one or more students, and assigns a package in the same step, generating a Stripe payment link automatically once your company has Stripe connected. This guide covers that second flow, since it's the one most admins mean when they say "add a family."
Every package you assign belongs to the family, not to an individual student — so if a family has two kids on one package, they draw down the same shared hour balance rather than two separate ones. Keep that in mind when deciding whether siblings should share a package or need their own.
Tips
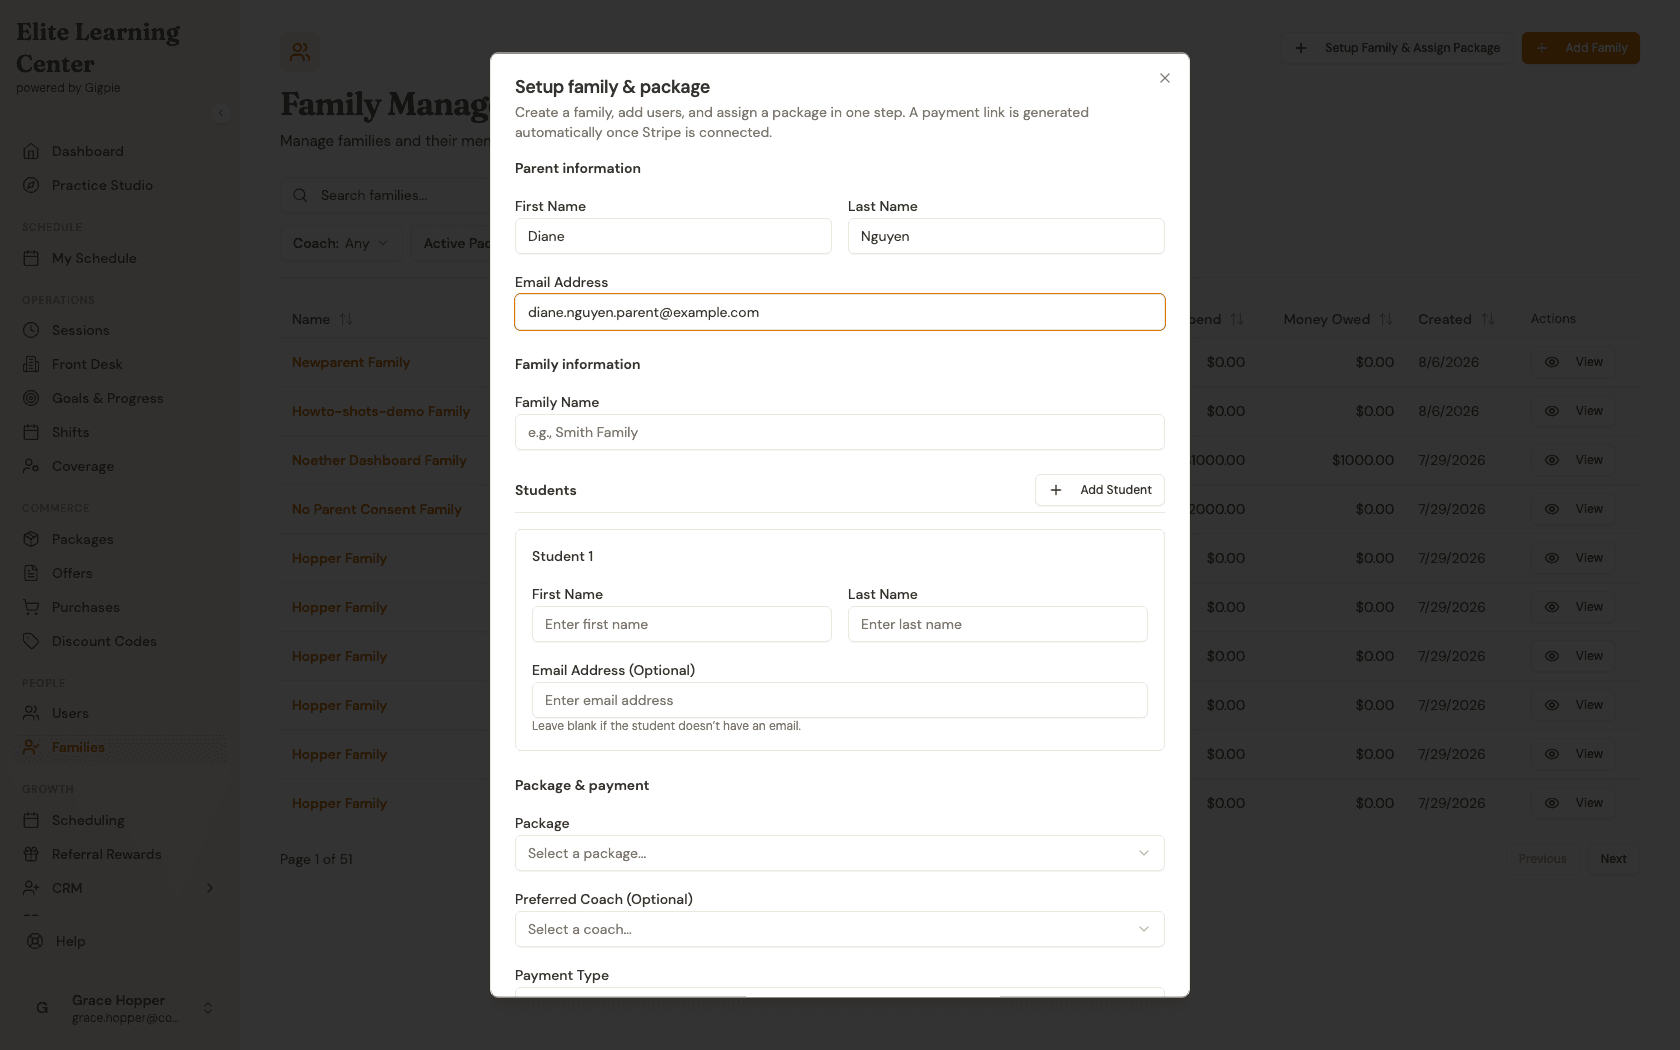
- Double-check the parent's email before submitting — that's the address the payment link is sent to.
- Add every student who'll use this package now; you can always add more from the family's detail page later, but it's one less step to do it here.
- If Stripe isn't connected yet, the package still gets assigned, just marked unpaid — connect Stripe in Settings first if you want to collect payment immediately.
- Assigning a preferred coach is optional. Skip it if you're not sure yet who'll take the family; you can assign one later from the family or session detail page.
- Installments are available from the Payment Type dropdown if the family would rather split the cost than pay in full.
Steps
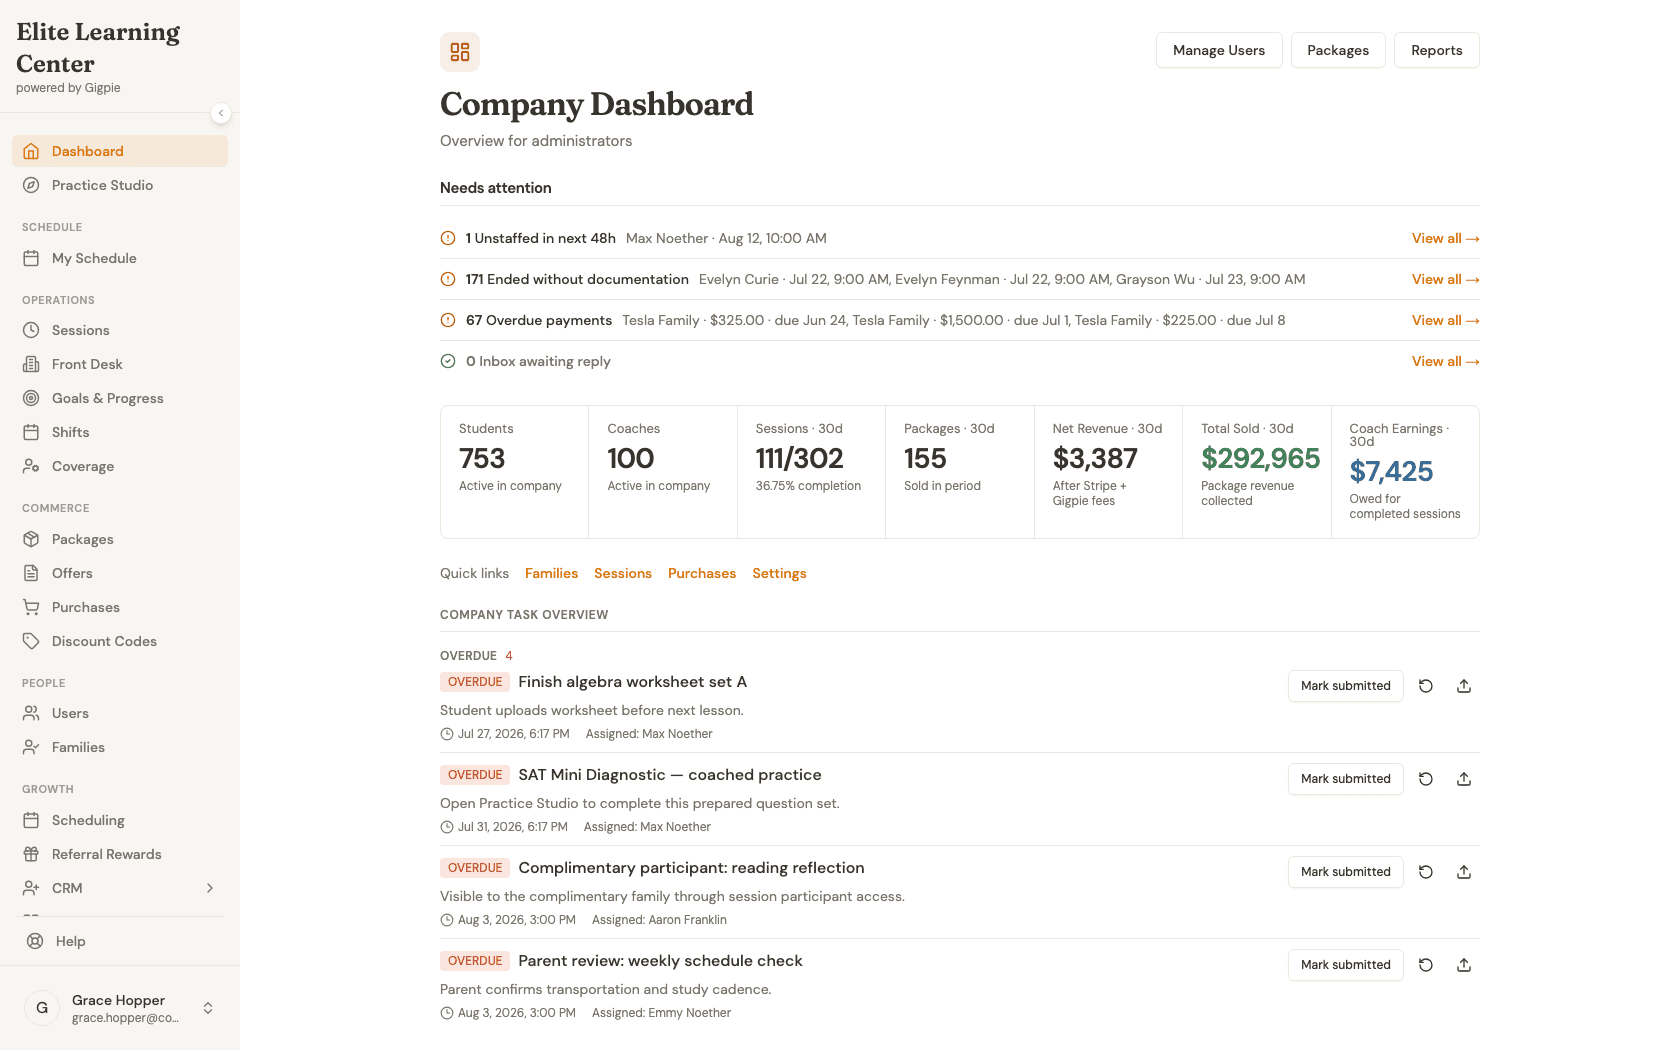
- 1Go to login
Sign in as an admin
Use your admin account credentials to access the dashboard.
- 2
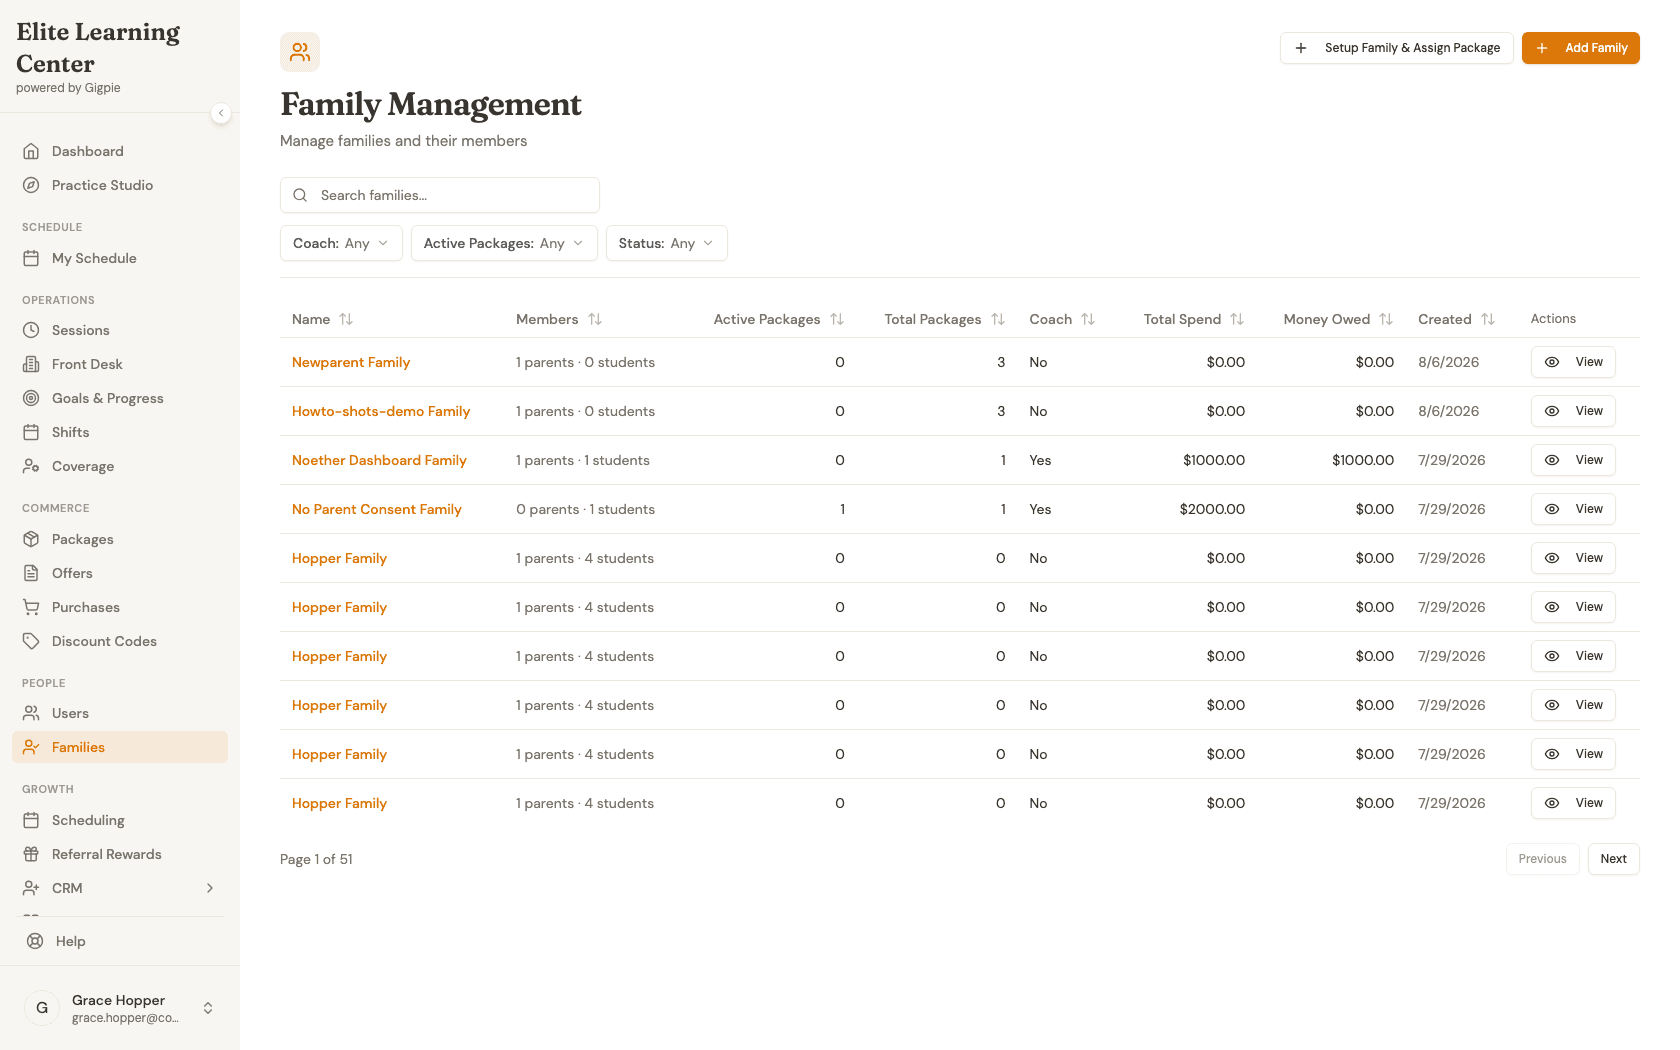
Navigate to Families
Click Families in the sidebar to open Family Management.
- 3
Open Setup Family & Package
Click "Setup Family & Assign Package" to start the guided onboarding flow.
- 4
Enter parent information
Fill in the parent's first name, last name, and email address. This creates their login and is where the payment link will be sent.
- 5
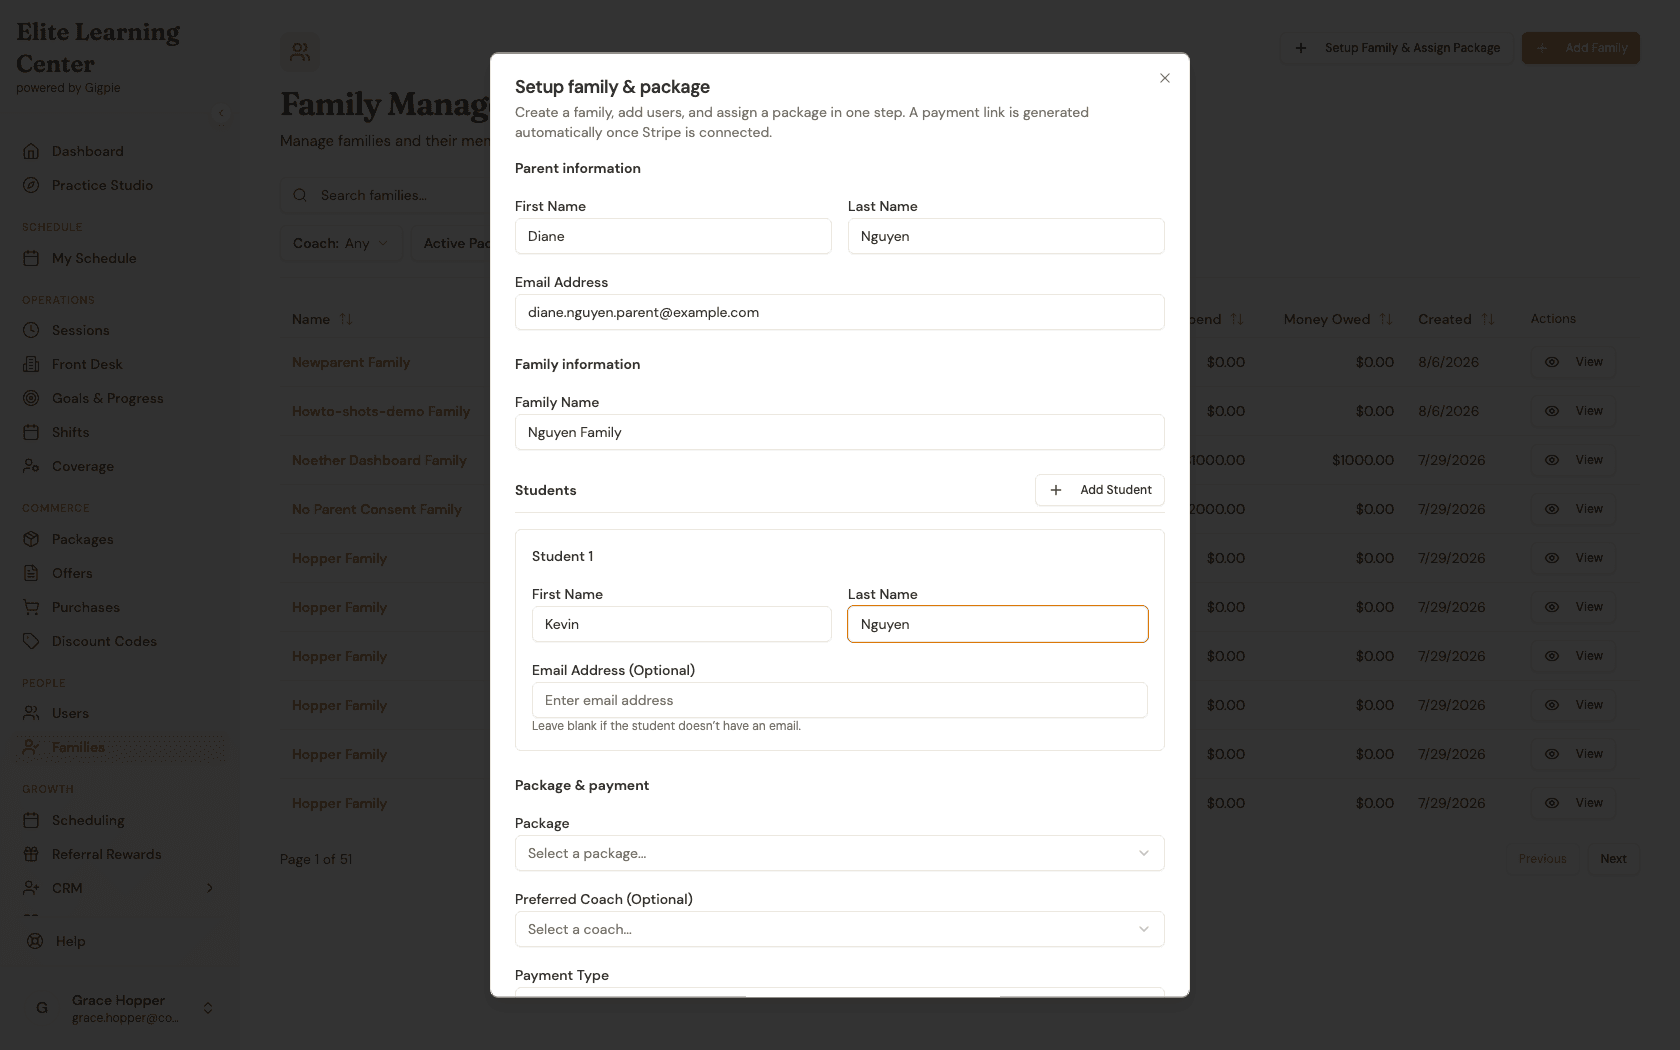
Add family and student information
Name the family, then fill in each student's first and last name. Click "Add Student" to enroll more than one child on the same package.
- 6
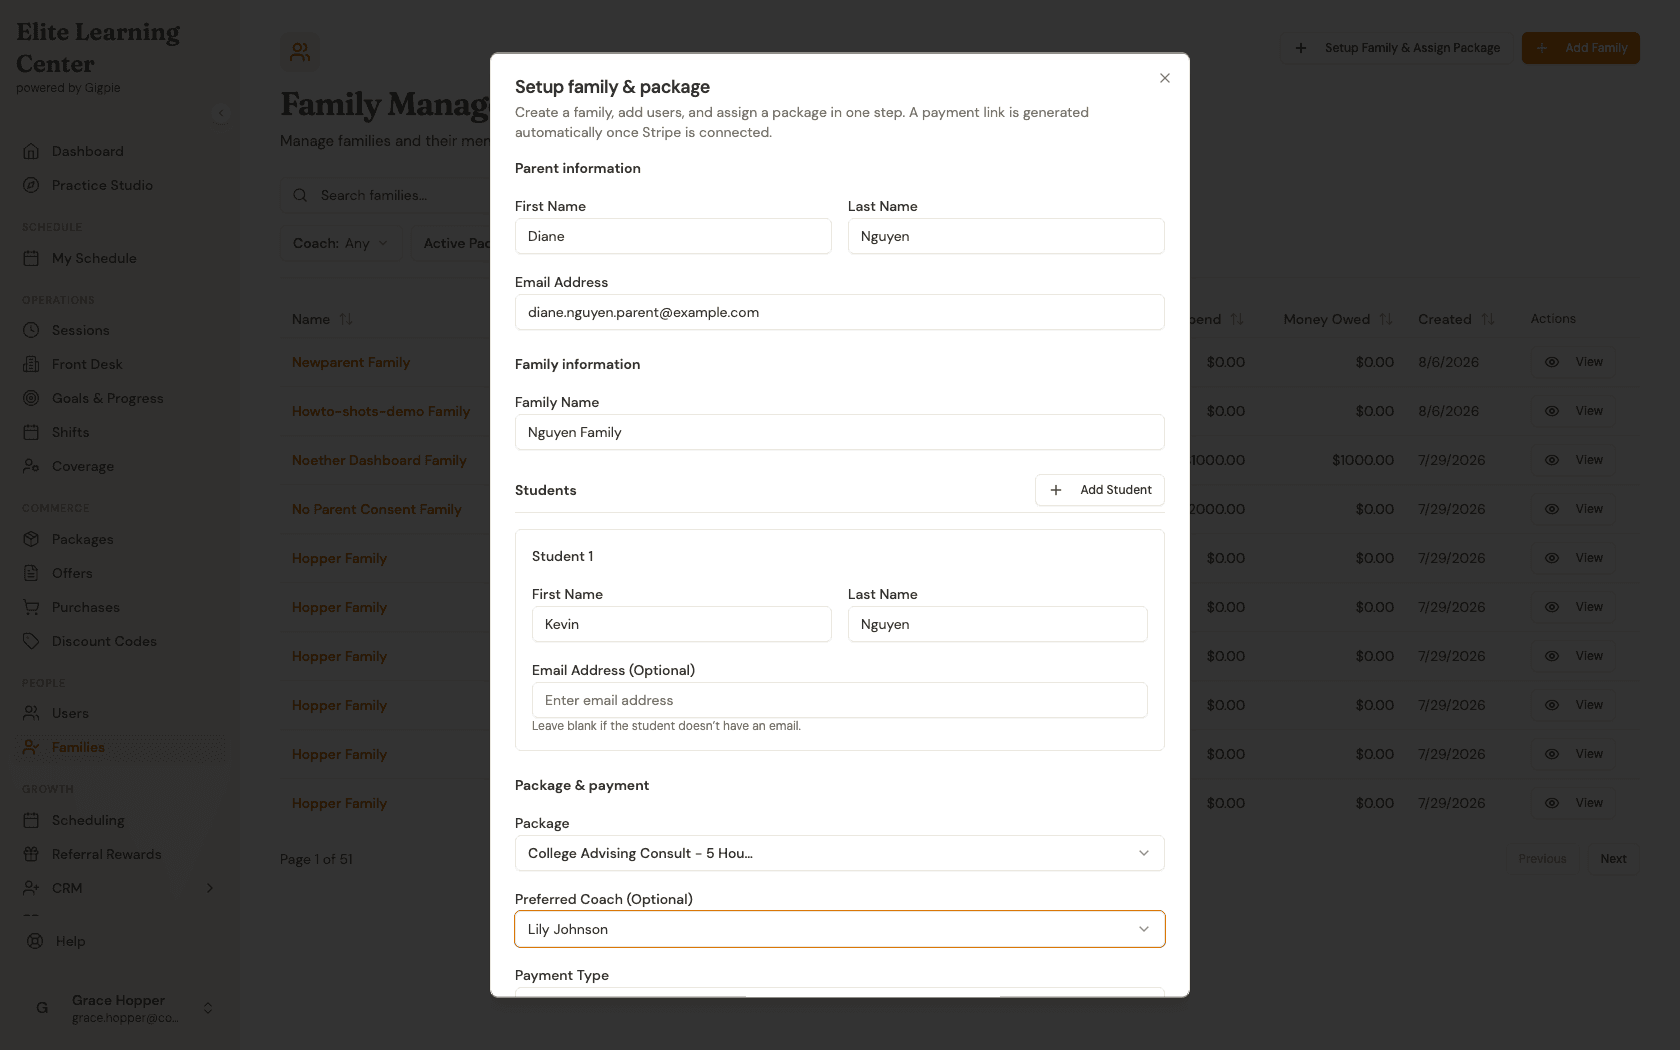
Select a package and coach
Choose the package this family is starting with. Optionally assign a preferred coach — you can leave this blank and assign one later.
- 7
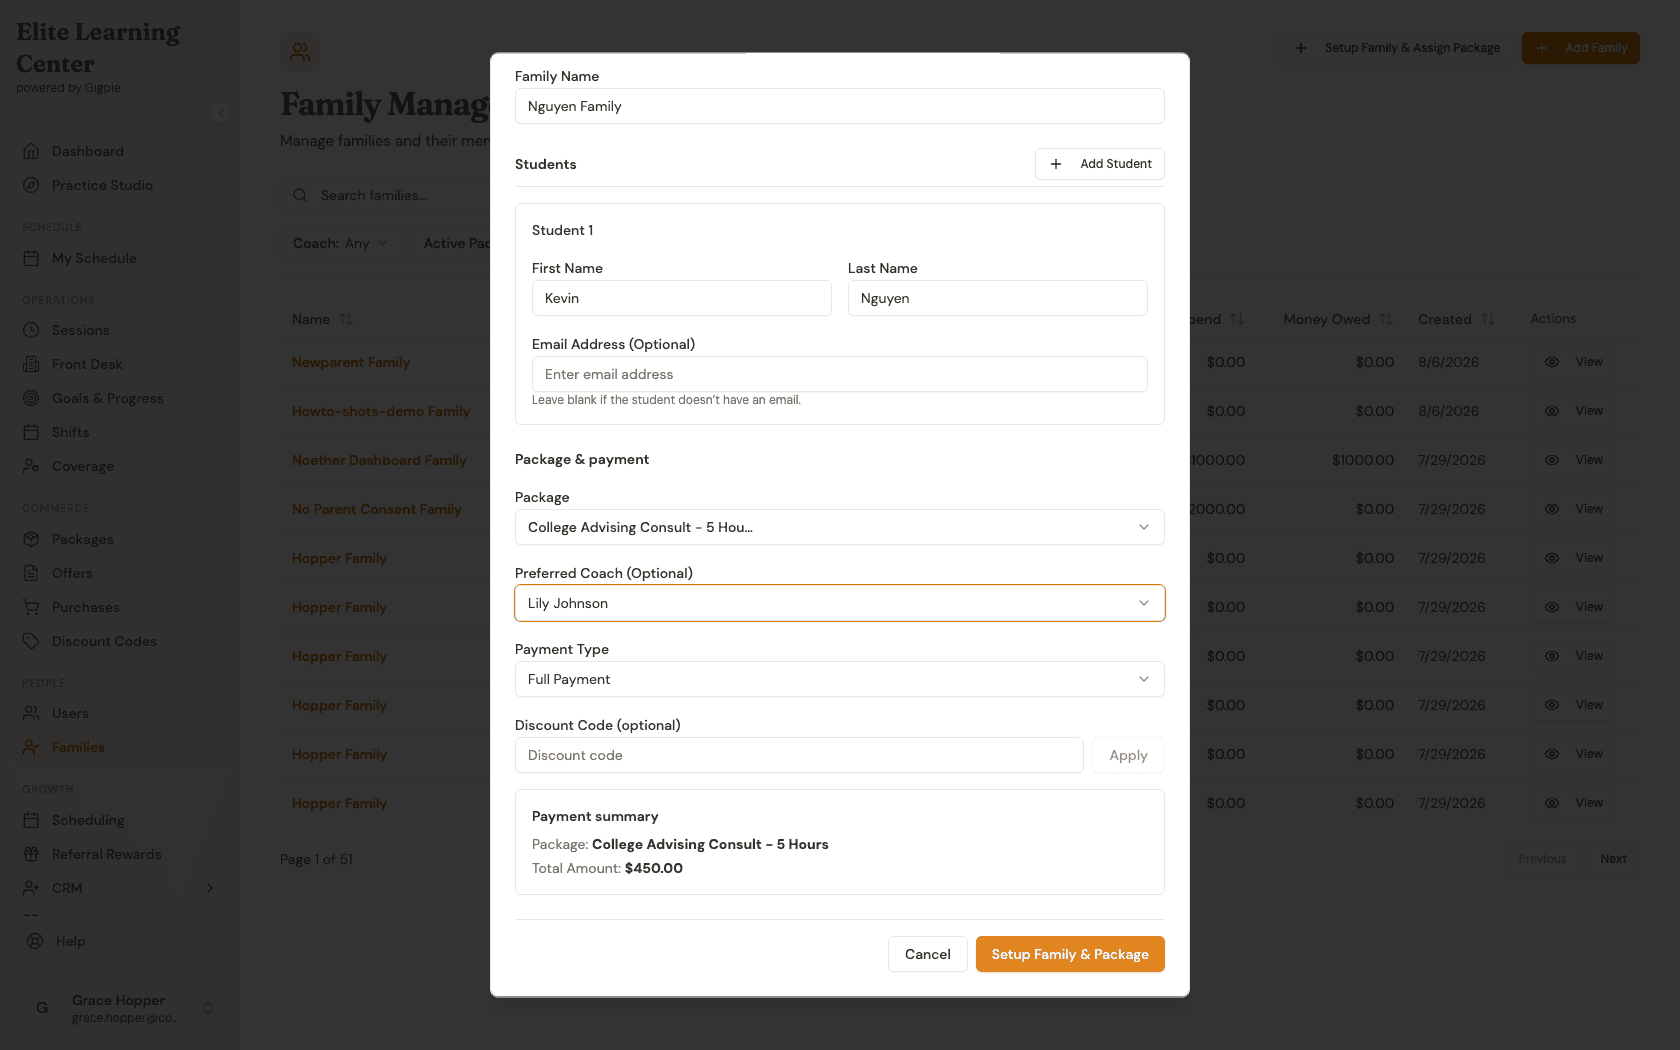
Review the summary and submit
Review the payment summary — package, discount (if any), and total amount — then click "Setup Family & Package" to create the family and send the payment link.
What you'll accomplish
- The family, its parent, and its student(s) are created together.
- A package is assigned to the family, drawing from one shared balance across all its students.
- If Stripe is connected, a payment link is emailed to the parent; otherwise the package is assigned unpaid until Stripe is connected.
Related Guides
- How to schedule a session as a coach - Book the family's first session once their package is assigned
- How to work leads in the CRM - Turn a lead into a family before this step
- Billing & Payments - How package pricing, payment links, and shared balances work