
How-To Guide - Admins
How to invite coaches and staff as an admin
Get your team logged in during week one: invite a coach or staff member by email and role, and know exactly what each role can do before you send it.
Updated August 10, 2026
Overview
Use this guide to get a new coach or staff member logged in during their first week: open User Management, invite them by name, email, and role, and send the invitation — the fastest path from "someone joined the team" to "they can log in and start working."
Before you start
- You have the new team member's first name, last name, and email address.
- You know which role they need — Coach, Staff, Parent, or Student.
Why this matters
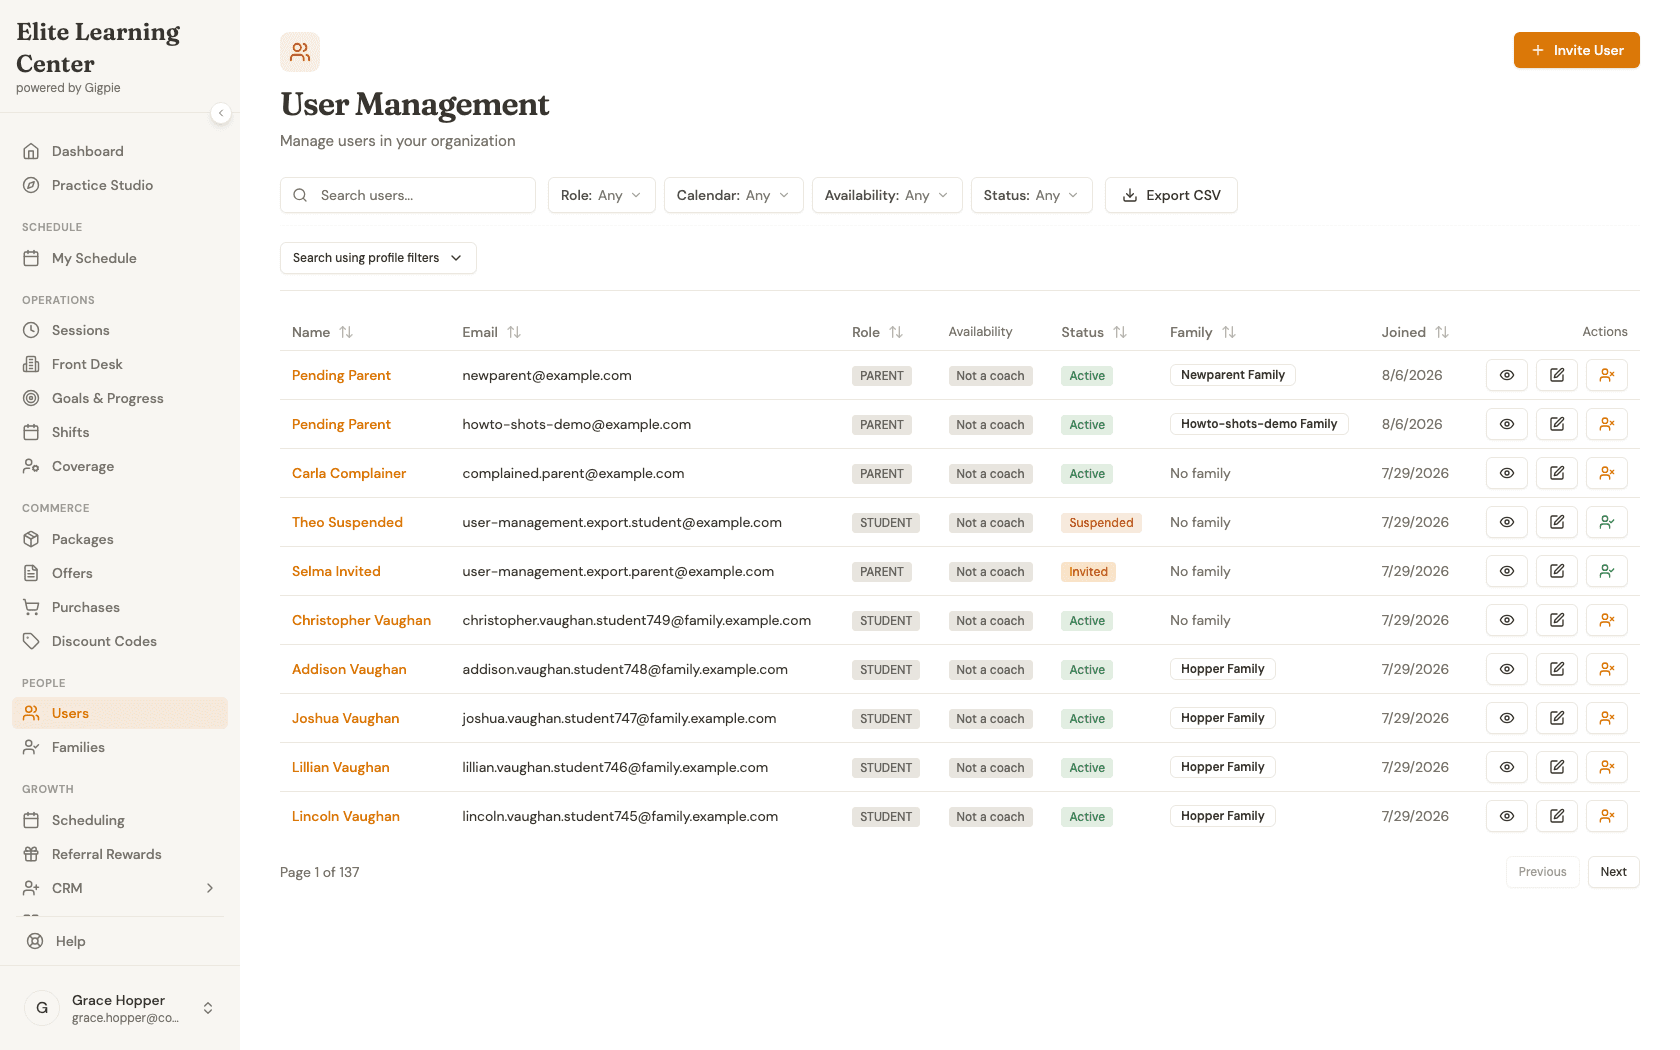
User Management is the single roster for everyone in your company — coaches, staff, parents, and students — with each row showing their role, whether their calendar availability is configured (for coaches), their status (Active, Invited, or Suspended), and which family they belong to (for parents and students). Inviting someone here creates their account and emails them a signup link; they set their own password when they accept.
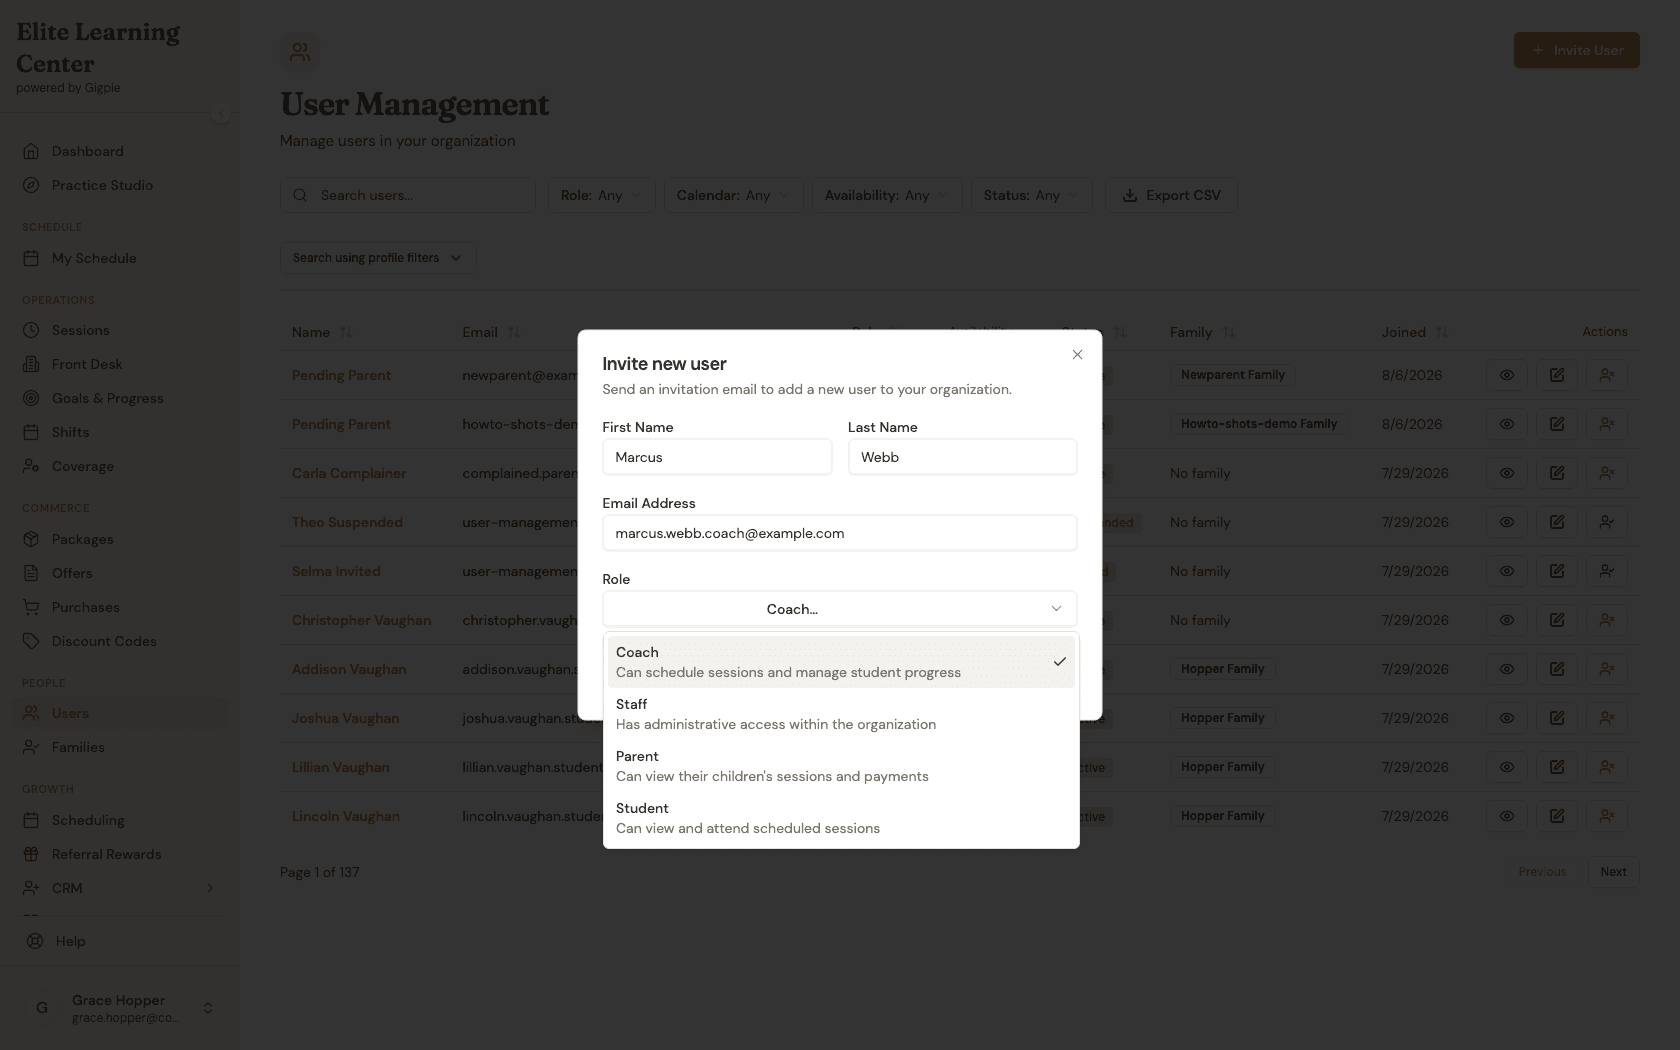
Role matters at invite time, not just afterward — it determines what the new person can see and do the moment they log in. Coach and Staff are the two roles you'll invite most during onboarding: a Coach can schedule sessions and manage student progress, while Staff gets broader administrative access across the organization. Pick the narrower role (Coach) unless the person genuinely needs admin-level access.
Tips
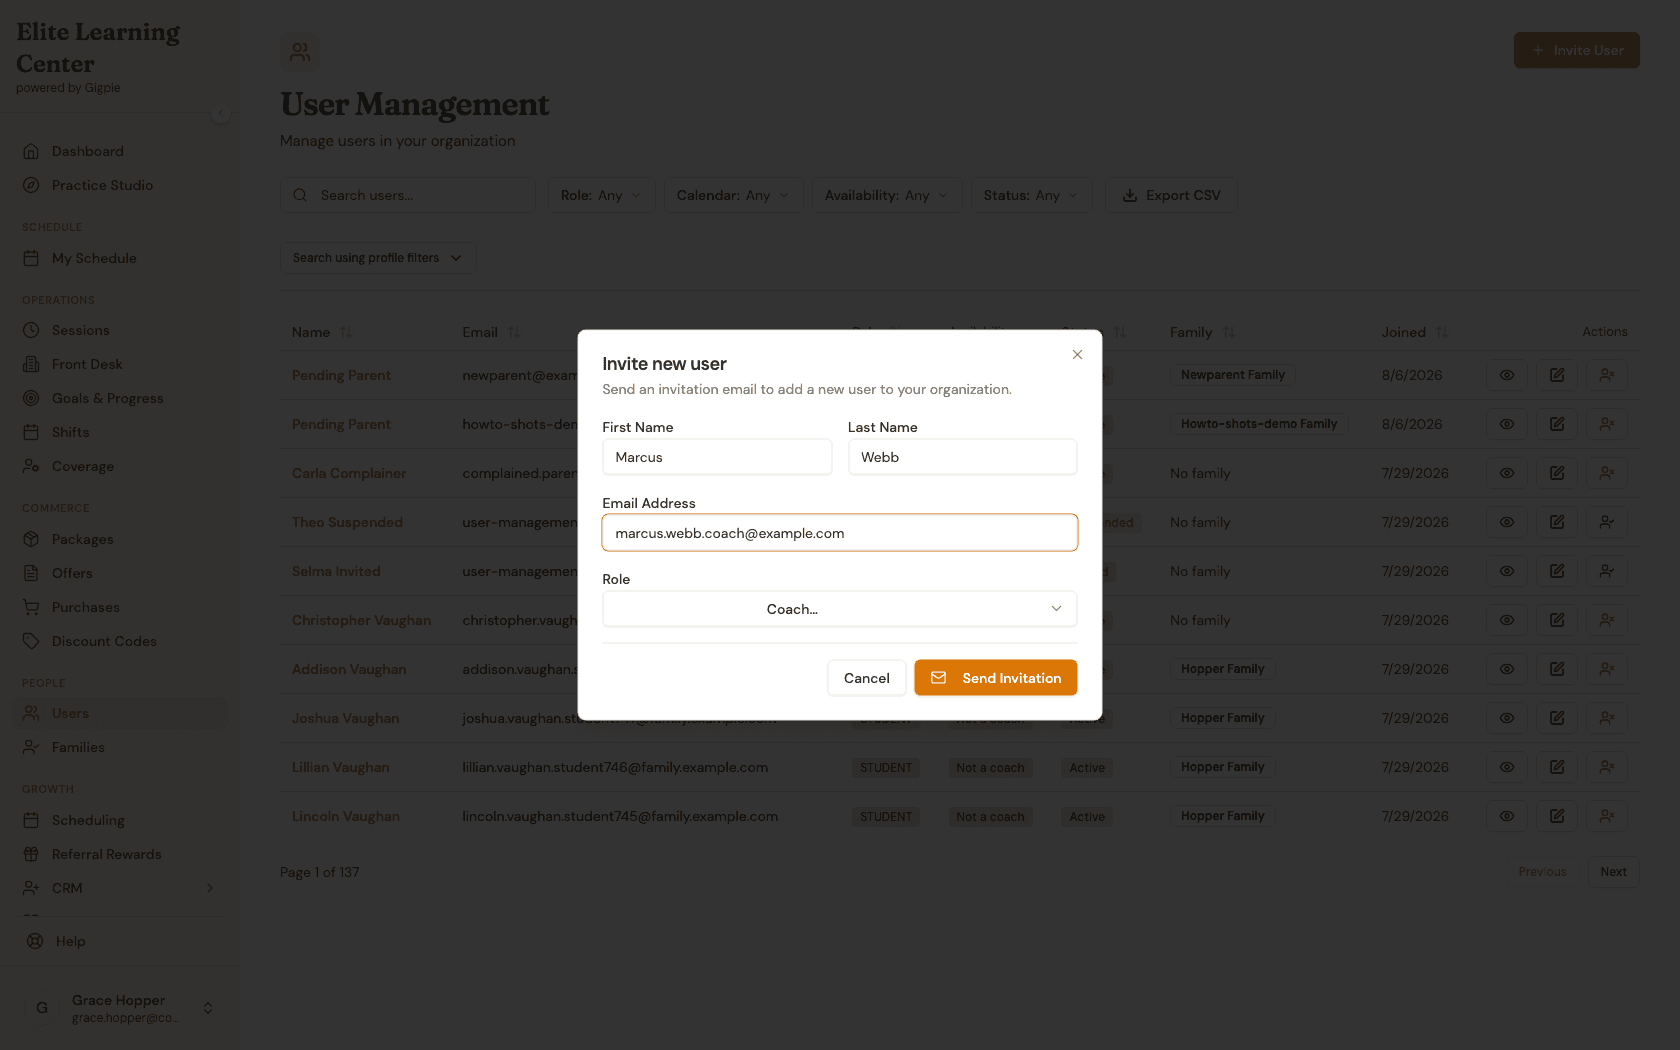
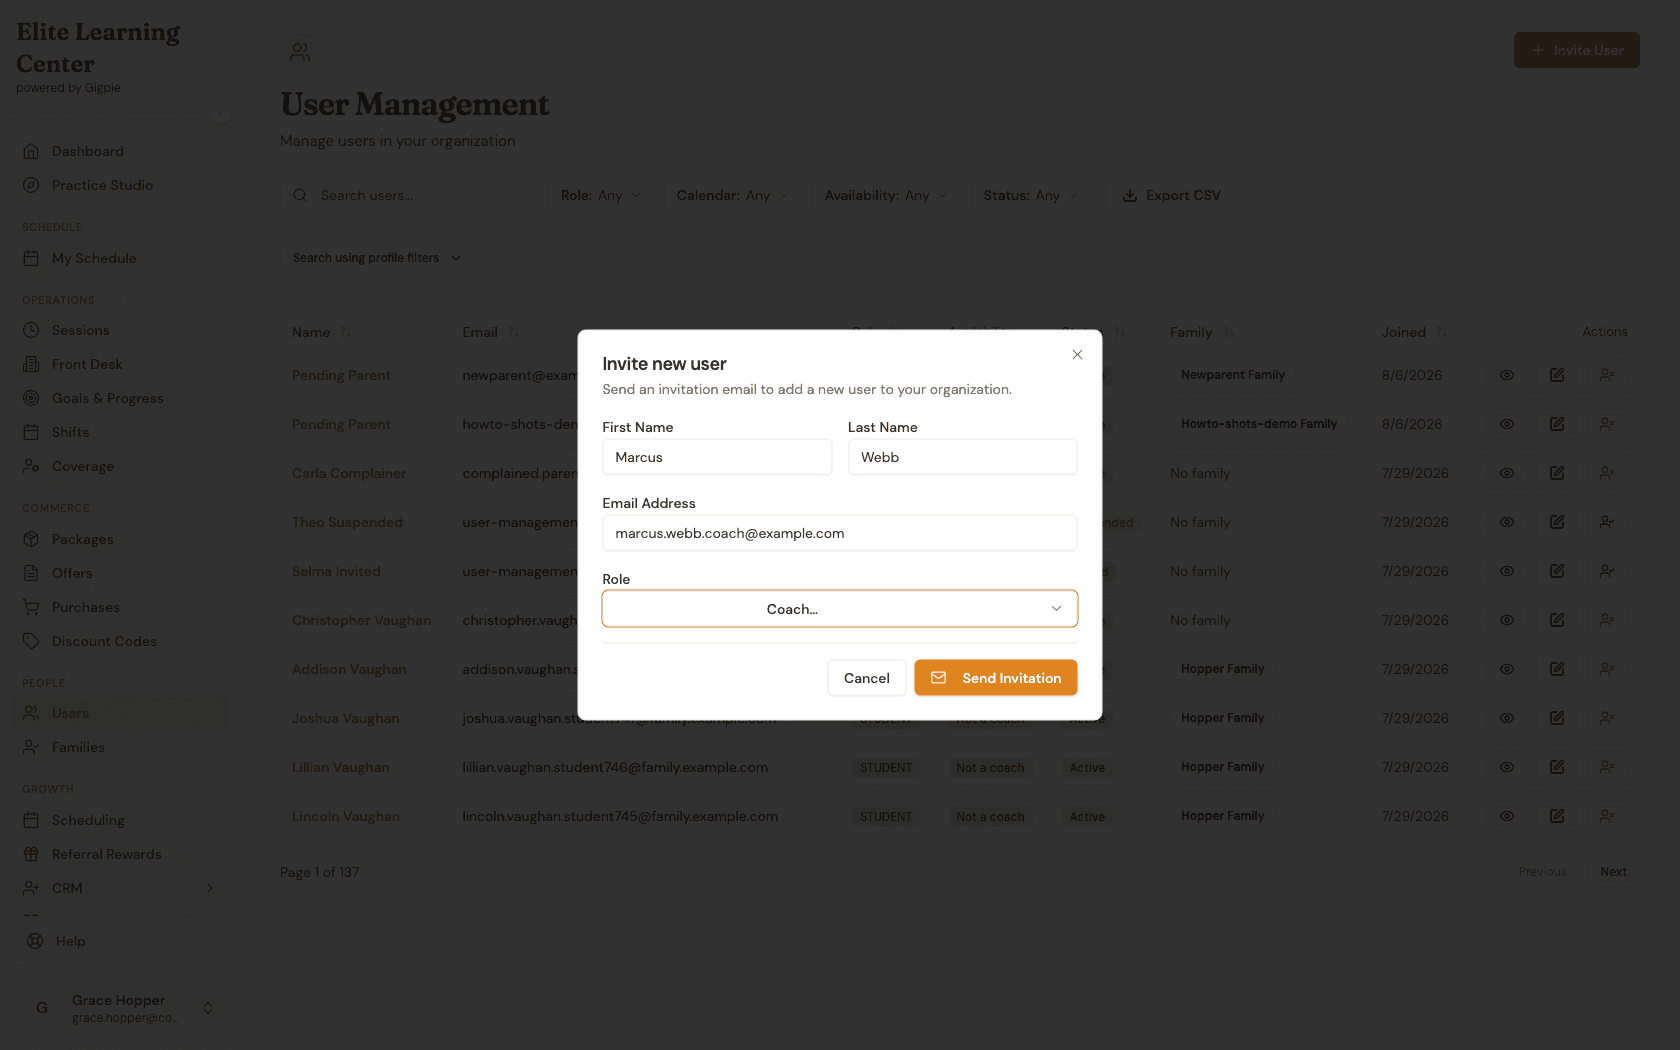
- Double-check the email address before sending — that's both the login and where the invitation link goes.
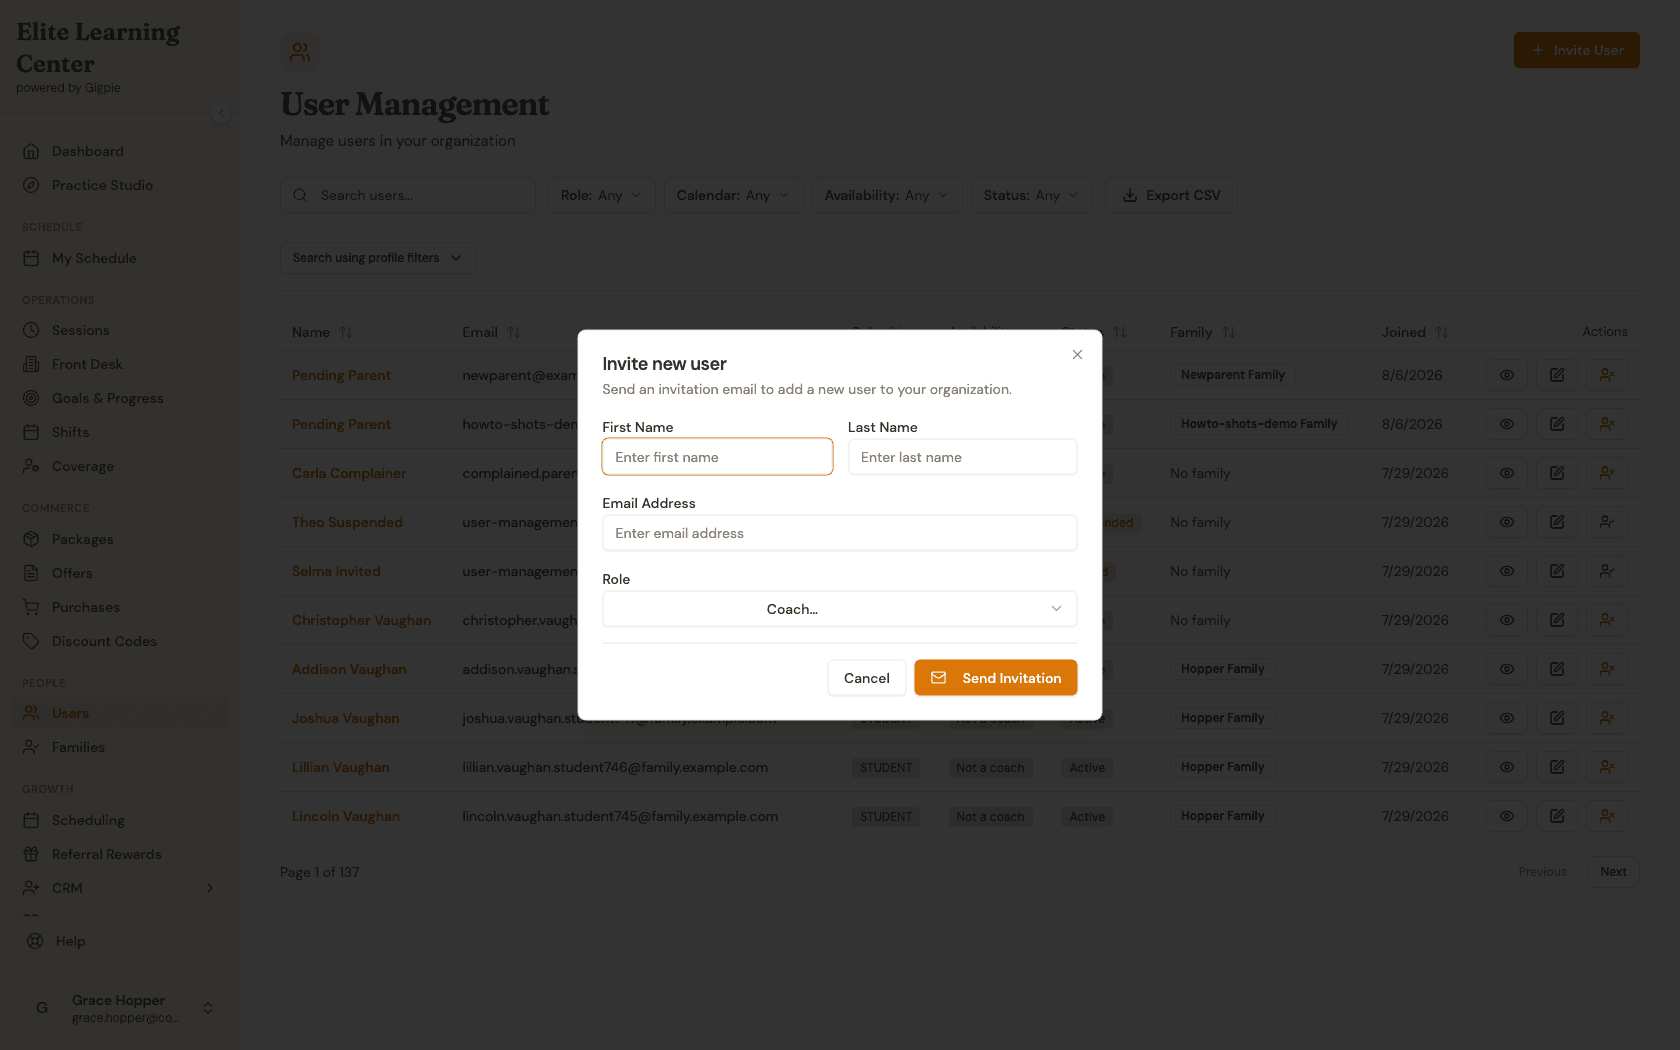
- The Role dropdown shows a one-line description under each option, so you can confirm you've picked the right access level before you send.
- User Management's filters (Role, Status, availability) make it easy to check who hasn't accepted their invite yet — filter Status to "Invited" to see everyone still pending.
- If you invite the wrong role by mistake, you can edit the user's role afterward from their row — you don't need to re-invite them.
Steps
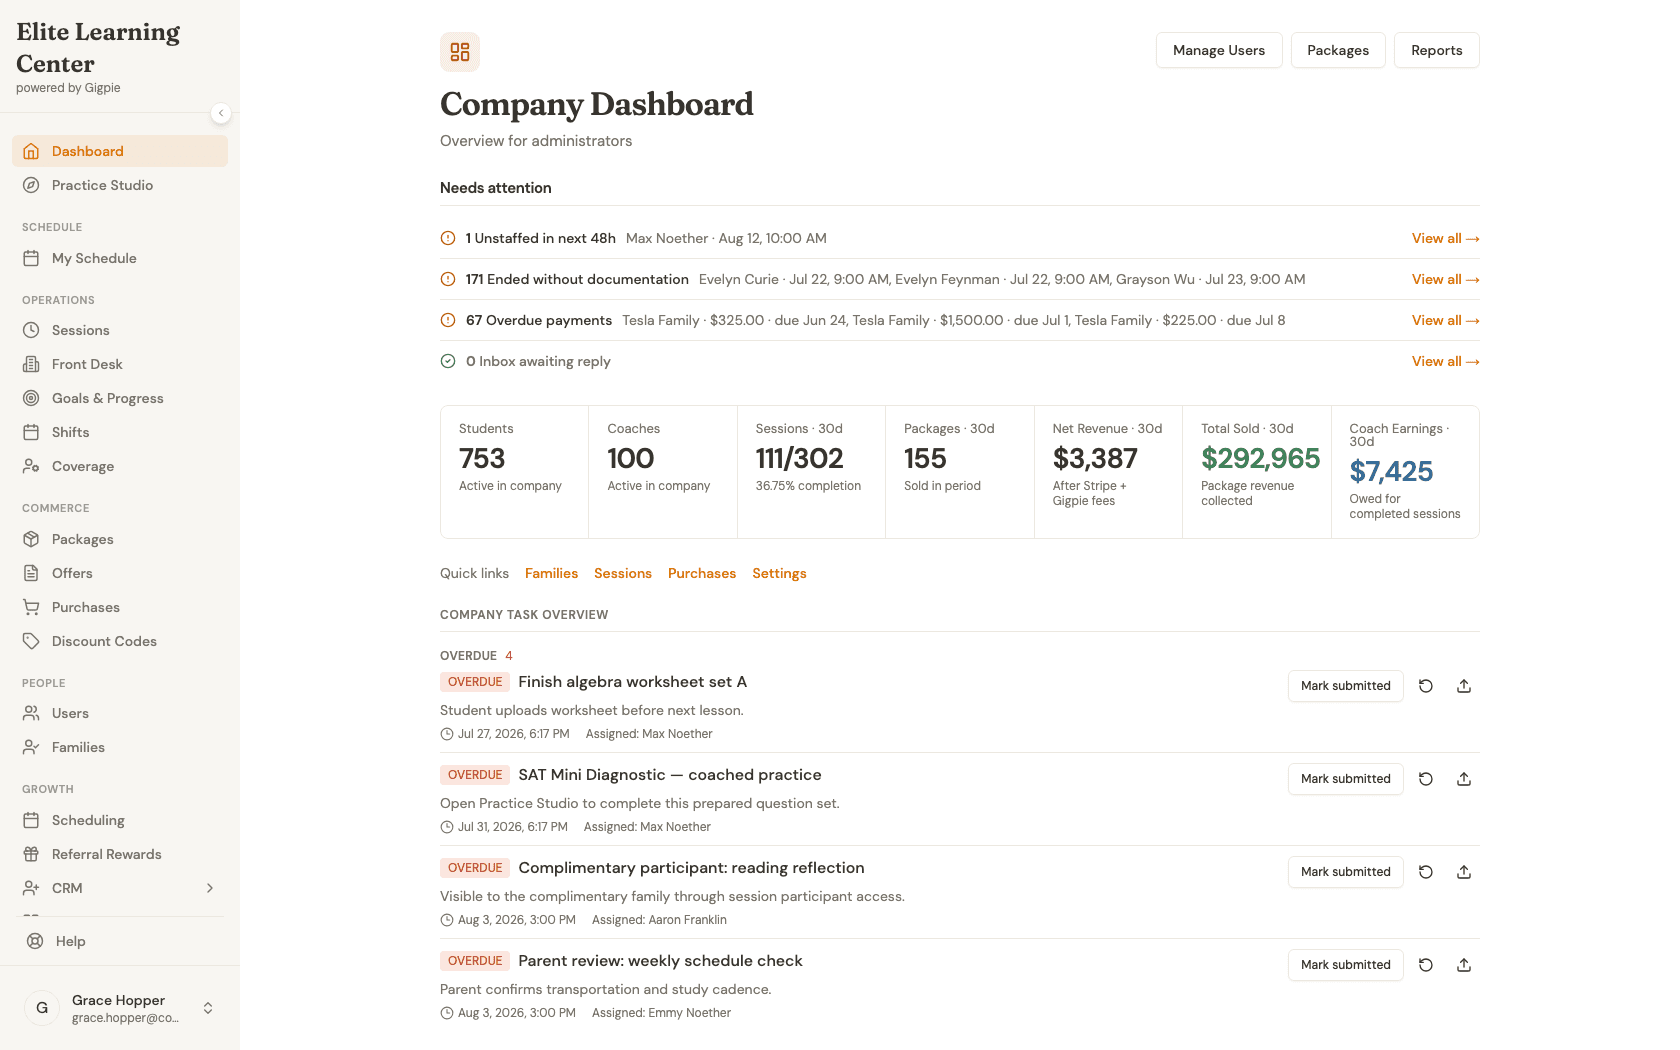
- 1Go to login
Sign in as an admin
Use your admin account credentials to access the dashboard.
- 2
Navigate to Users
Click Users in the sidebar to open User Management and see the existing roster.
- 3
Open Invite User
Click "Invite User" to open the invitation dialog.
- 4
Enter name and email
Fill in the new team member's first name, last name, and email address.
- 5
Choose a role
Open the Role dropdown to see what each of the four roles can access — Coach, Staff, Parent, and Student.
- 6
Review before sending
With Coach selected and the form complete, review the details, then click "Send Invitation" to email the new team member their signup link.
What you'll accomplish
- You can open User Management and read the existing roster — who's active, invited, or suspended.
- You know how to invite a new coach or staff member with the right role.
- You understand what each of the four roles can access before you send an invite.
Related Guides
- How to add a family and set up students as an admin - The other first-week setup: getting families onto the roster
- How to update your calendar schedule as a coach - What a newly-invited coach sets up next
- How to manage coverage and open shifts as an admin - Once your team is in, this is how you cover their time off